In this post, I’ll walk through the steps for how to create an application using Microsoft Authentication Library for .Net (MSAL.Net) to call an Azure AD protected Azure Function App using Easy Auth (Azure App Service’ Authentication and Authorization feature).
1. Create an Azure Function with Easy Auth enabled:
Assuming you already have an Azure Function App created (refer to https://docs.microsoft.com/en-us/azure/azure-functions/functions-create-function-app-portal if you don’t know how to create one), go to that Function App in the Azure portal and create an Azure Function. For convenience, I’ll use the Http Trigger In-portal template to create an Azure Function.
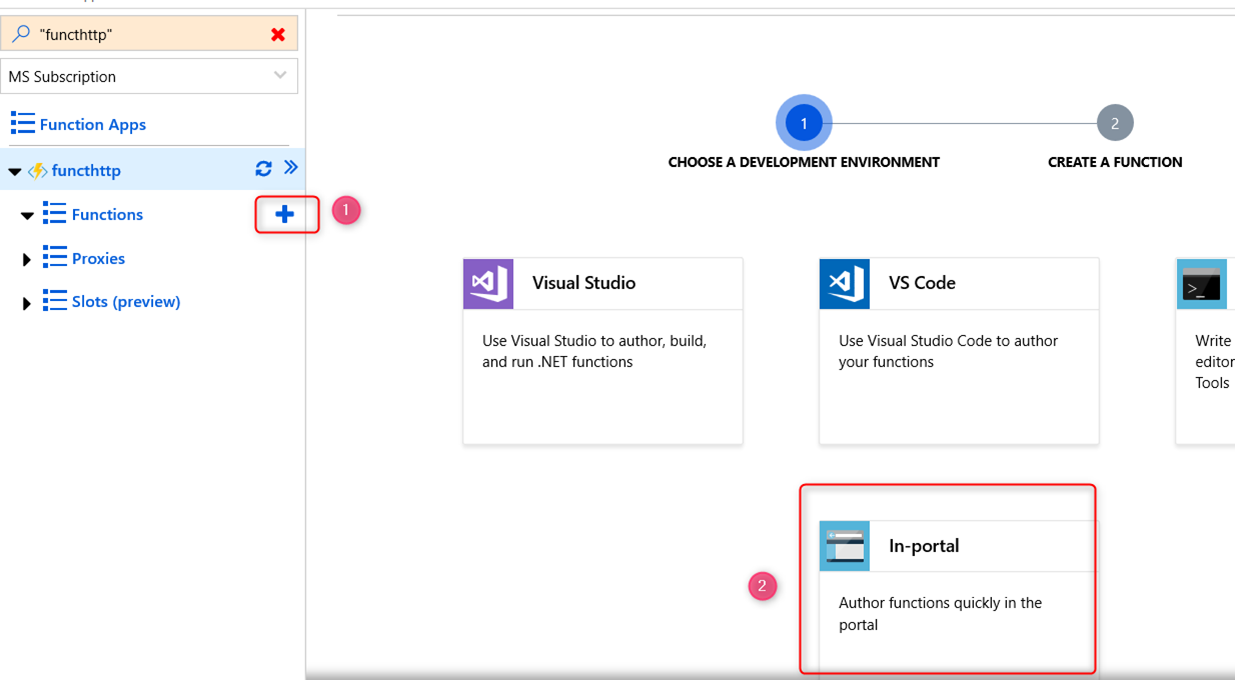
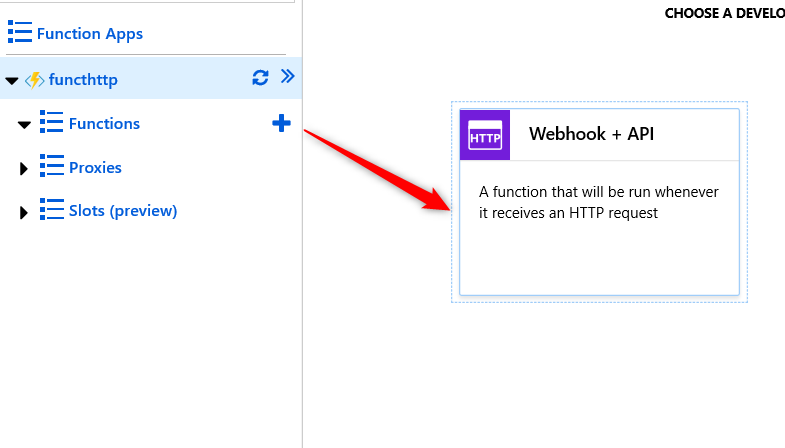
Click on ‘Continue’ and then select ‘Webhook + API’ blade and then ‘Create’.
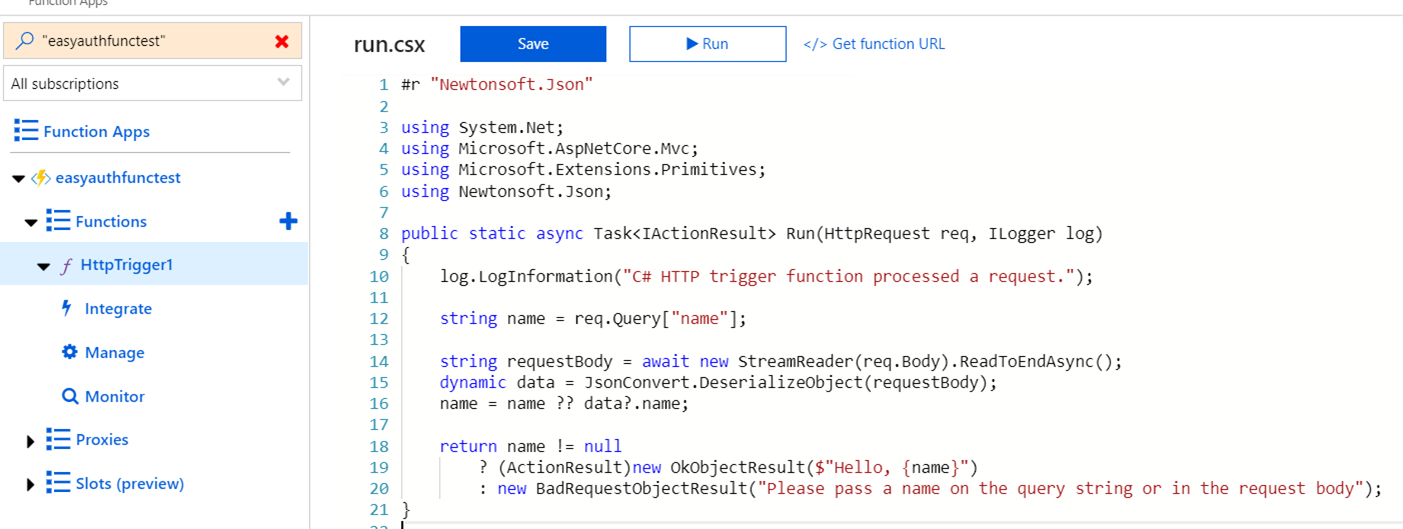
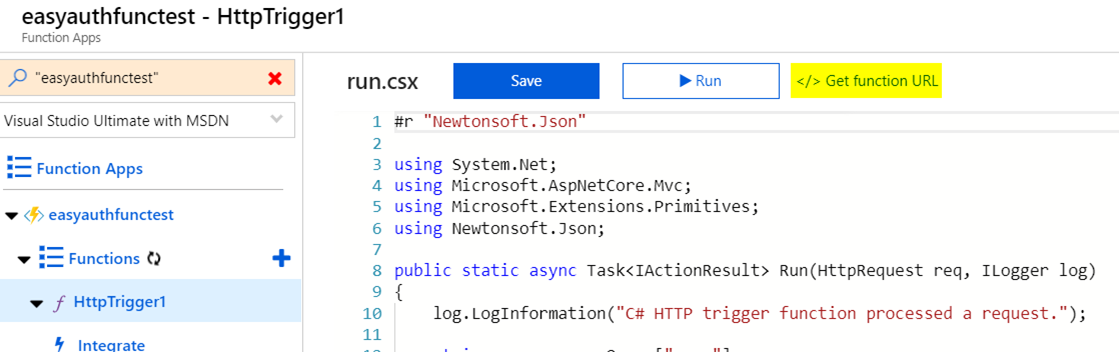
The template generates the following code in the run.csx file
#r "Newtonsoft.Json"

using System.Net;
using Microsoft.AspNetCore.Mvc;
using Microsoft.Extensions.Primitives;
using Newtonsoft.Json;

public static async Task<IActionResult> Run(HttpRequest req, ILogger log)
{
log.LogInformation("C# HTTP trigger function processed a request.");

string name = req.Query["name"];

string requestBody = await new StreamReader(req.Body).ReadToEndAsync();
dynamic data = JsonConvert.DeserializeObject(requestBody);
name = name ?? data?.name;

return name != null
? (ActionResult)new OkObjectResult($"Hello, {name}")
: new BadRequestObjectResult("Please pass a name on the query string or in the request body");
}
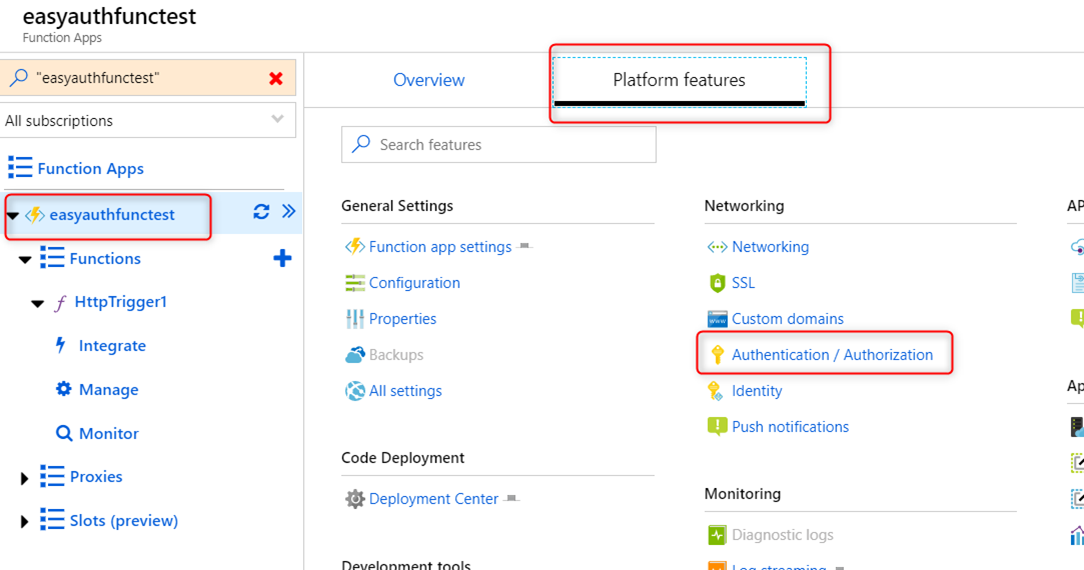
Now that we have our Function created, we need to turn on Easy Auth, so navigate to the Azure Function App and select the “Authentication / Authorization” link in the ‘Platform features’ tab
Select ‘On’ for App Service Authentication and ‘Log in with Azure Active Directory’ in the “Action to take when request is not authenticated” section
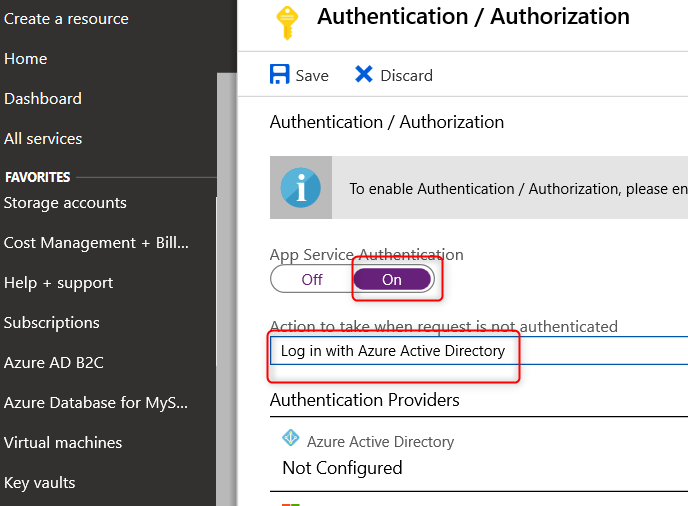
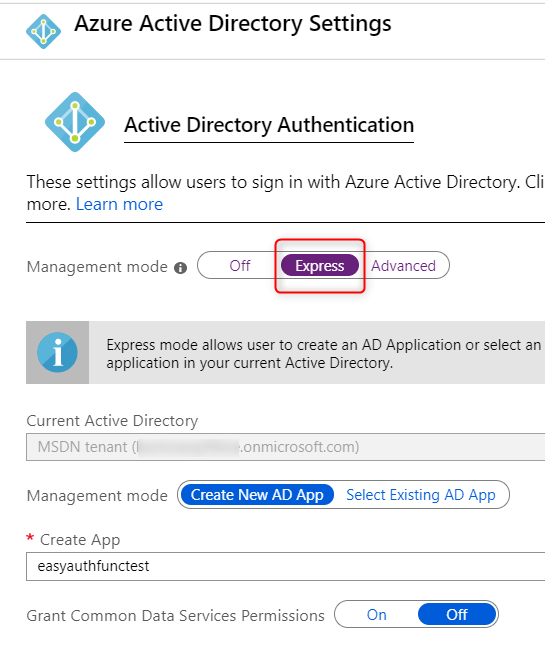
In the ‘Authentication Providers’ section select ‘Azure Active Directory’ and choose the Express for Management mode and ‘Create New AD App’ and Save:
Now that Easy Auth is turned on, test the Function App URL in the browser to make sure it requires authentication. The Function URL can be obtained from the “</> Get function URL” link. Append the name query string at the end since the Function expects this name value. My test Function URL is https://easyauthfunctest.azurewebsites.net/api/HttpTrigger1?code=zIrQXHC9ypU2ewa4YadZfXgka7XgNG/U7J/kDGW79aXig3q907jo2A==&name=Azure
When I navigate to the above link, I get prompted for credential and then see the message “Hello, Azure” in the browser after logging in.
2. Create a new App Registration for the MSAL .Net app
Navigate to the Azure portal -> Azure Active Directory -> App registrations -> New registration to create a new App Registration. I use the following parameter for my registration.
|
Name |
msalclient |
|
Supported account types |
Accounts in this organizational directory only |
|
Redirect URI |
myapp://auth |
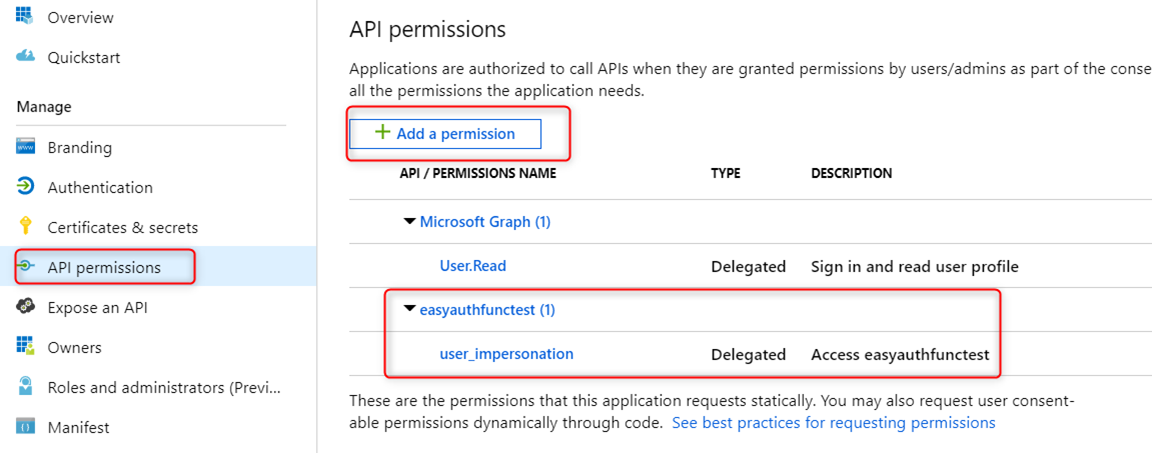
Once created, go to that app registration select API permissions -> Add a permission -> select the above Azure Function App in the ‘APIs my organization uses’ tab to add that permission:
Take note of the following since you will need them later when creating the MSAL App.
Overview blade:
- Application ID
- Directory ID
Authentication blade:
-
Redirect URI – this should be myapp://auth
as registered above
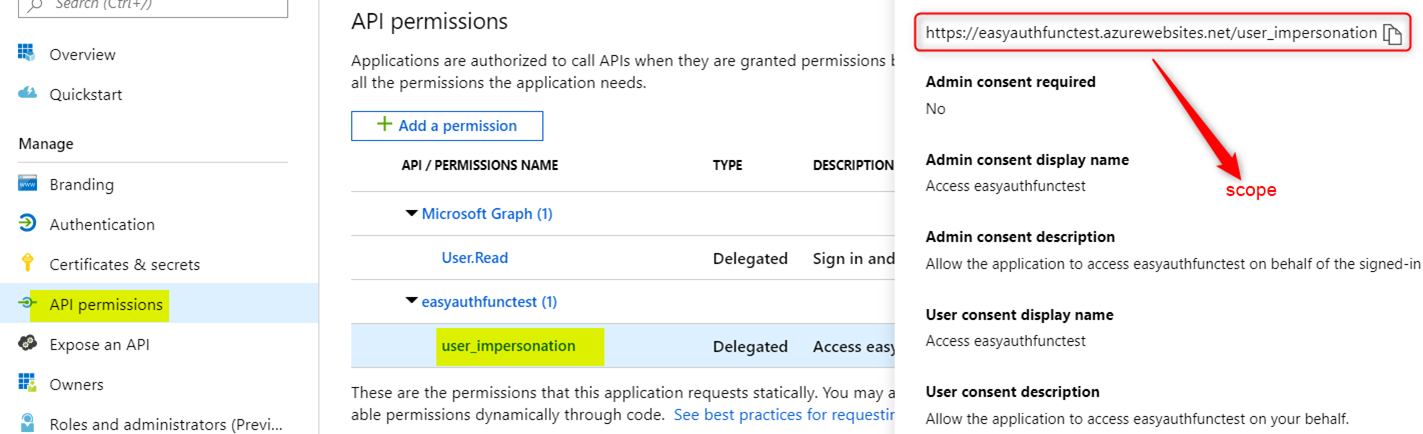
API permissions blade:
-
Get the scope for this Azure Function App: (see screen shot below):
3. Create an MSAL Application
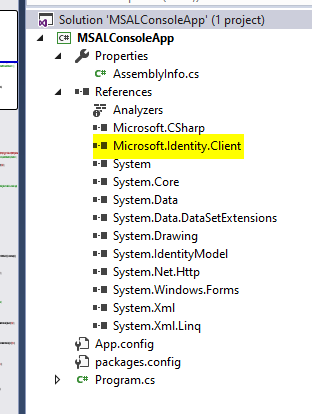
- In Visual Studio, create a new C# Console (.Net Framework) project
-
Add the “Microsoft.Identity.Client” nuget package to the project
- Use the following code in the Program.cs file. Remember to fill in the scopes, ClientId, replyURL, and Tenant (Directory ID) with the info above
class Program
{
static string[] scopes = new[] { "https://easyauthfunctest.azurewebsites.net/user_impersonation" };
static string ClientId = "xxx";
static string Tenant = "xxx";
static string replyURL = "myapp://auth";
…
}
[gist id=”9f03df153b77e7cf78041f3fba4880f5″ file=”Program.cs”]
-
Build and run the application to login to Azure AD. Once logged in you should see the following output in the console
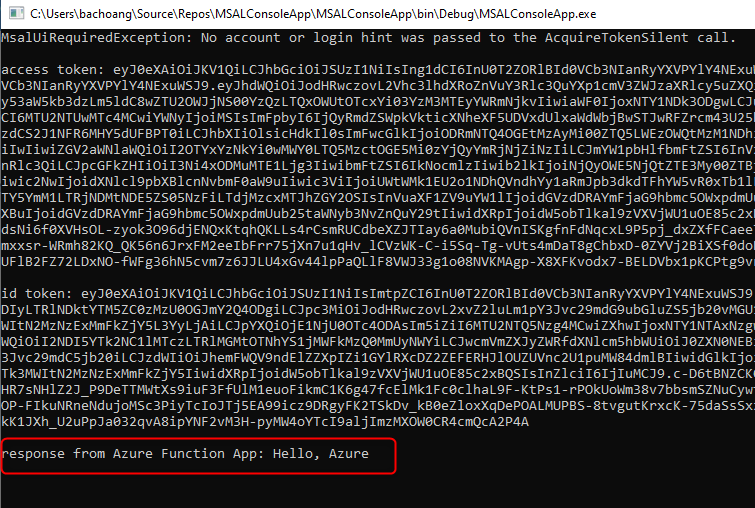
Voila, we got the output from Azure Function App.