Making MS Graph Requests using Managed Identities

This blog post is an extension to my previous post about how to get secrets and access tokens using Managed Identities with VB.Net and C#. You can read that post here. There is a c# sample for this particular blog here. The scenario here is that you already have the code to use the managed identities and now you want to get an access token for a resource that requires it have a roles claim for permissions in the access token. For example, the code for the previous post is getting an access token for Azure SQL, which does not require any permissions in the token as the token is only used to identify the user ( in this case, a managed identity ) and the aud claim to verify it is for that resource. So, lets see what changes we need to make to get an access token for Microsoft Graph that requires the permission “User.Read.All” to be able to list users in the tenant.

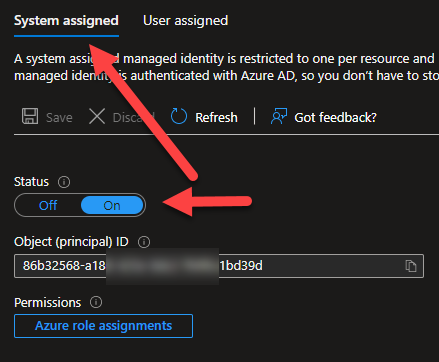
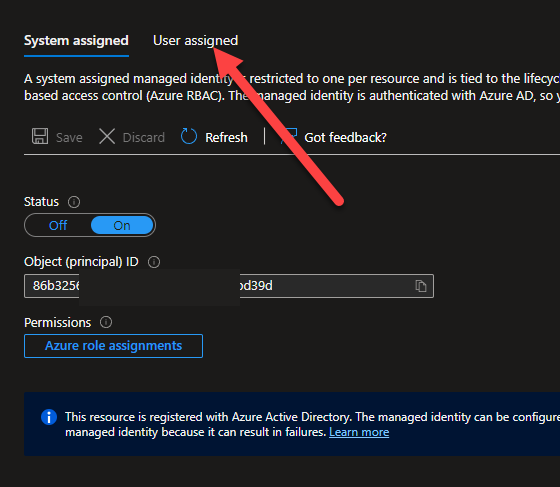
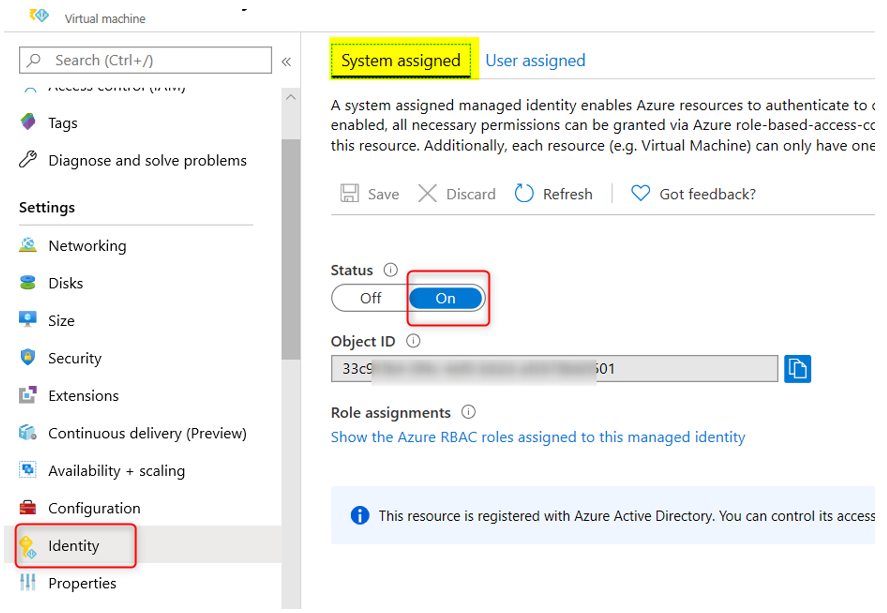
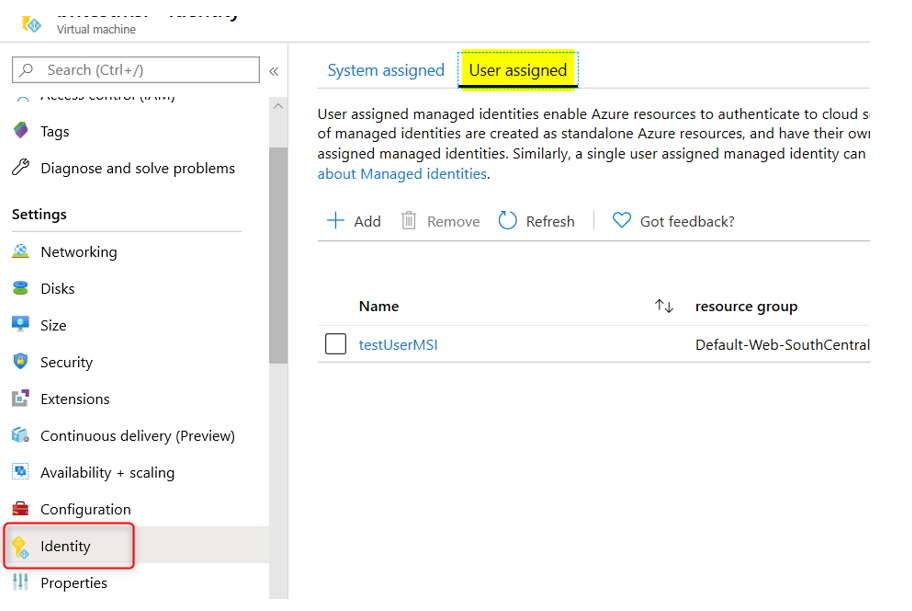
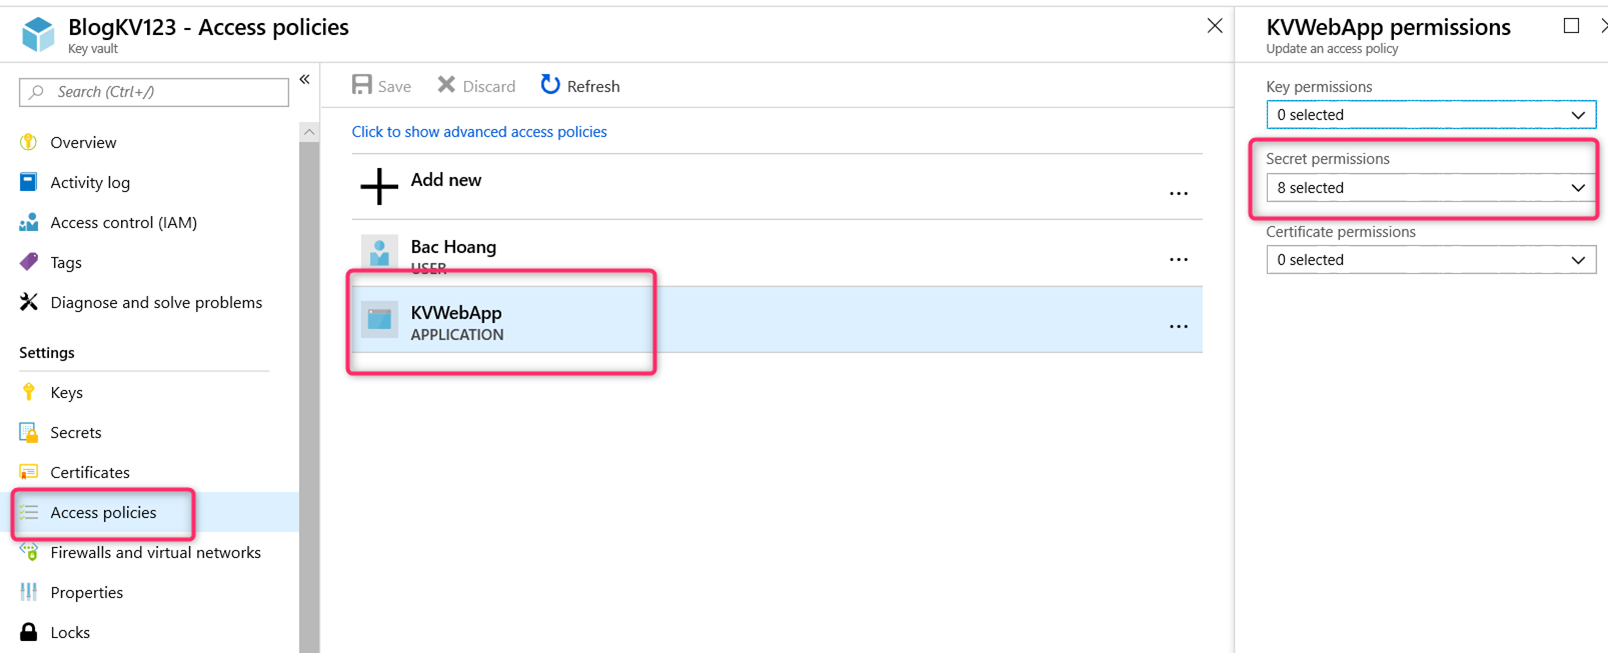
To begin with, a User Assigned Managed Identity will have a service principal in the Enterprise applications blade, however, no app registration, which is where you normally go to assign and consent to permissions. A System Assigned Managed Identity does not have a service principal that is viewable in the Enterprise applications blade. To get permissions consented for Microsoft Graph on those identities, you will need to make an OAuth Permission Grant. The following PowerShell script will do just that.

# CONFIGURATION

# Your tenant id (in Azure Portal, under Azure Active Directory -> Overview )
$TenantID = "{your tenant id}"

# Name of the manage identity (same as the Logic App name)
$DisplayNameOfApp = "{your managed identity name}" 

# Check the Microsoft Graph documentation for the permission you need for the operation
$Permissions = @("User.Read.All")
 
# MAIN SCRIPT

# Microsoft Graph App ID
$MSGraphAppId = "00000003-0000-0000-c000-000000000000"

# Uncomment the next line if you need to Install the module (You need admin on the machine)
# Install-Module Microsoft.Graph
Connect-MgGraph -TenantId $TenantID -scopes Application.ReadWrite.All

# Get the application we want to modify
$sp = (Get-MgServicePrincipal -Filter "displayName eq '$DisplayNameOfApp'")
  
# If assigning MS Graph Permissions
$GraphServicePrincipal = Get-MgServicePrincipal -Filter "appId eq '$MSGraphAppId'"
 
# Add permissions
foreach($permission in $Permissions)
{
 $AppRole = $GraphServicePrincipal.AppRoles | Where-Object {$_.Value -eq $permission -and $_.AllowedMemberTypes -contains "Application"}

  New-MgServicePrincipalAppRoleAssignment -ServicePrincipalId $sp.Id -PrincipalId $sp.Id -ResourceId $GraphServicePrincipal.Id -AppRoleId $AppRole.Id
}


<# Remove permissions - this portion of the script show how to remove those same permissions
$AppRoleAssignments = Get-MgServiceAppRoleAssignedTo -ObjectId $sp.ObjectId

foreach($permission in $Permissions)
{

  $AppRole = $GraphServicePrincipal.AppRoles | Where-Object {$_.Value -eq $permission -and $_.AllowedMemberTypes -contains "Application"}

 foreach($AppRoleAssignment in $AppRoleAssignments)
	{
		if($AppRole.Id -eq $AppRoleAssignment.Id) {
			Remove-MgServiceAppRoleAssignment -ObjectId $sp.ObjectId -AppRoleAssignmentId $AppRoleAssignment.objectid
		}
		
	}
}
#>

Thank you to Will Fiddes for the PowerShell script!

Once your permissions are on the service principal, you can then make a token request using that resource ( https://graph.microsoft.com ).

Note: Once you make a token request for a resource, you will get the same token for the next 24 hours, even if you make permission changes. You will need to wait for the current token to expire in order to get a token with any new permissions.

Once you have your permissions, it is a matter of changing the resource parameter in the code for the access token request like this ( c# first, then vb.net ):

AccessToken at = credential.GetToken(new TokenRequestContext(new string[] { "https://graph.microsoft.com" }));
Dim at As AccessToken = credential.GetToken(New TokenRequestContext(New String() {"https://graph.microsoft.com"}))

Now, this is just showing how to get an access token for a resource such as Microsoft Graph. However, when using the Graph service client in code, you do not need to specify the resource as the graph service client will be handling that for you. In the VB.Net code, you will need to add the Microsoft.Graph nuget package and then add the Imports Microsoft.Graph at the top of the code file.

    Sub Main()

        Do While True
            Get_AccessToken_With_UserAssigned_MSI()
            Make_GraphRequest_withUserMSI_Token()
            Get_Secret_With_UserAssigned_MSI()

            Get_AccessToken_With_SystemAssigned_MSI()
            Get_Secret_With_SystemAssigned_MSI()
            Make_GraphRequest_withSystemMSI_Token()

            Console.WriteLine("Press Enter to try again or any other key to exit")
            Dim key As ConsoleKeyInfo = Console.ReadKey()

            If Not key.Key = ConsoleKey.Enter Then
                Return
            End If
        Loop


    End Sub

    Sub Get_AccessToken_With_UserAssigned_MSI()
        Console.WriteLine($"Getting access token with user assigned msi:")

        Dim credential As New ManagedIdentityCredential(userAssignedClientId)

        Dim at As AccessToken = credential.GetToken(New TokenRequestContext(New String() {"https://graph.microsoft.com"}))
        Dim accessToken As String = at.Token.ToString()
        Console.WriteLine($"Access Token = {accessToken}")

    End Sub

    Sub Make_GraphRequest_withUserMSI_Token()
        Console.WriteLine($"Making graph request with User MSI Token:")

        Dim credential As New ManagedIdentityCredential(userAssignedClientId)

        Dim graphClient As New GraphServiceClient(credential)

        Dim users As IGraphServiceUsersCollectionPage
        Try
            users = graphClient.Users().Request.GetAsync().Result
            Console.WriteLine($"Number of users in tenant: {users.Count}{vbCrLf}")
        Catch ex As Exception
            Console.WriteLine($"Exception: {ex.Message}")
        End Try


    End Sub

    Sub Get_AccessToken_With_SystemAssigned_MSI()
        Console.WriteLine($"Getting access token with system assigned msi:")

        Dim credential As New ManagedIdentityCredential()
        Dim at As AccessToken = credential.GetToken(New TokenRequestContext(New String() {"https://graph.microsoft.com"}))

        Dim accessToken As String = at.Token.ToString()
        Console.WriteLine($"Access Token = {accessToken}")
    End Sub

    Sub Make_GraphRequest_withSystemMSI_Token()
        Console.WriteLine($"Making graph request with system MSI token:")

        Dim credential As New ManagedIdentityCredential()

        Dim graphClient As New GraphServiceClient(credential)

        Dim users As IGraphServiceUsersCollectionPage
        Try
            users = graphClient.Users().Request.GetAsync().Result
            Console.WriteLine($"Number of users in tenant: {users.Count}{vbCrLf}")
        Catch ex As Exception
            Console.WriteLine($"Exception: {ex.Message}")
        End Try


    End Sub

Similar, the missing code snippets for the C# project:

        static void Main(string[] args)
        {
            while (true)
            {
                Console.Clear();

                Get_AccessToken_With_UserAssigned_MSI();
                Get_Secret_With_UserAssigned_MSI();
                Make_GraphRequest_With_UserMSI_Token();

                Get_AccessToken_With_SystemAssigned_MSI();
                Get_Secret_With_SystemAssigned_MSI();
                Make_GraphRequest_With_SystemMSI_Token();

                Console.WriteLine("Press Enter to try again or any other key to exit");
                ConsoleKeyInfo key = Console.ReadKey();
                if (key.Key != ConsoleKey.Enter)
                {
                    return;
                }
            }

        }

        static void Get_AccessToken_With_UserAssigned_MSI()
        {
            Console.WriteLine($"Getting access token with user assigned msi:");

            ManagedIdentityCredential credential = new ManagedIdentityCredential(userAssignedClientId);

            AccessToken at = credential.GetToken(new TokenRequestContext(new string[] { "https://database.windows.net" }));
            string accessToken = at.Token;

            Console.WriteLine($"Access Token = {accessToken}");

        }

        static void Get_AccessToken_With_SystemAssigned_MSI()
        {
            Console.WriteLine($"Getting access token with system assigned msi:");

            ManagedIdentityCredential credentail = new ManagedIdentityCredential();

            AccessToken at = credentail.GetToken(new TokenRequestContext(new string[] { "https://database.windows.net" }));
            string accessToken = at.Token;

            Console.WriteLine($"Access token = {accessToken}");

        }

        static void Make_GraphRequest_With_UserMSI_Token()
        {
            Console.WriteLine($"Making graph request with User MSI Token:");

            ManagedIdentityCredential credential = new ManagedIdentityCredential(userAssignedClientId);
            GraphServiceClient graphClient = new GraphServiceClient(credential);

            IGraphServiceUsersCollectionPage users;

            try
            {
                users = graphClient.Users.Request().GetAsync().Result;
                Console.WriteLine($"Number of users in tenant: {users.Count}\n");
            } catch(Exception ex)
            {
                Console.WriteLine($"\nException: {ex.InnerException.Message}");
            }

        }

        static void Make_GraphRequest_With_SystemMSI_Token()
        {
            Console.WriteLine($"Making graph request with system MSI Token:");

            ManagedIdentityCredential credential = new ManagedIdentityCredential();
            GraphServiceClient graphClient = new GraphServiceClient(credential);

            IGraphServiceUsersCollectionPage users;

            try
            {
                users = graphClient.Users.Request().GetAsync().Result;
                Console.WriteLine($"Number of users in tenant: {users.Count}\n");
            }
            catch (Exception ex)
            {
                Console.WriteLine($"\nException: {ex.InnerException.Message}");
            }
        }

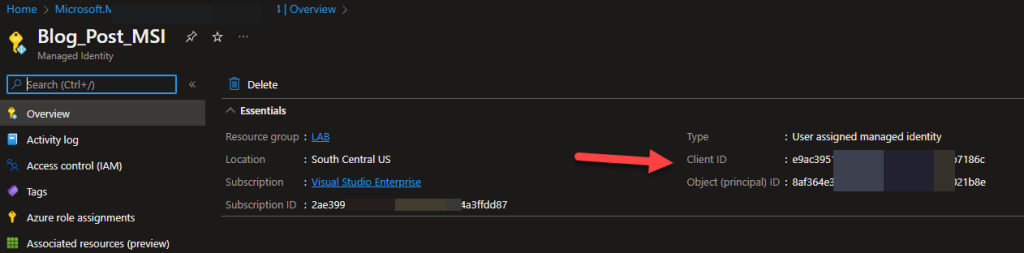
Download the projects from my GitHub ( link on the previous post ) and once those are running properly, you can then add the missing pieces here for both the VB.Net project and the C# project. Remember, you will need to run the powershell script for both the User Assigned Managed Identity as well as the System Assigned Managed identity, using the names for those identities.

Using Azure Identity Client with VB.Net or C# to get a KeyVault secret

This blog post will show you how to use the Azure Identity Client library in VB.Net and C# to use a Managed Identity to access a secret in KeyVault. This is assuming that you already have a keyVault secret and the user has the proper access policy to read a keyvault secret. This post will not show you how to do those tasks, only how to implement the Azure Identity client library in a vb.net application and access a secret as well as generating an access token. I have based this blog post on the following documents:


You can find the VB.Net sample in my GitHub here. Also, there is a C# version of the sample in my Github here.

Before we start, lets set up a resource, a system assigned identity for that resource, and then a user managed identity that has access to the resource. The resource that I will set up is simply a VM in Azure ( so I can run visual studio there and have my code work ). The key to this is the code must run in the resource you have configured in order to be able to use the managed identity. You cannot run a desktop app from your local machine and have it use a managed identity in an Azure VM, for example. So, I have setup a VM in Azure with a pretty basic plan ( 8 gb memory ) so that I can install the community edition of Visual Studio and compile and run my code.

The next step is to create the system assigned managed identity. This is pretty straight forward, after creating the VM, go to the “Identity” blade on the VM and the under System assigned, just click the status to “On” and the object ID will be listed for that identity.

We will be coming back here later to assign our User assigned identity to this resource ( the VM ). To create a user assigned credential, you will need to go to the Managed Identities blade in the portal. Click on the “+ Create” button.

You will need to select the subscription to use, the Resource group, region and name ( the name is going to be the name for your Managed Identity ).

You can then continue to add tags or simply press the Review + Create button. You will need to consent but then the MSI will be created. Once created, click the “Go to resource” button and you will be able to get the Client ID on that blade, which will be needed for the User Assigned Managed Id in code:

We are not quite done with the User assigned id because you still need to assign it to both the VM ( or where the code is going to run from ) and also create an access policy in KeyVault for both of our MSI’s. To assign the User assigned MSI, go to the VM, click on the User assigned tab, and then add the MSI here.

You will be able to find the User assigned managed identity, then select it, click add and it will be added.

Now, both of our managed identities ( the system assigned and the user assigned ) need to have an access policy in KeyVault created. So, lets go to the KeyVault resource in Azure ( assuming you already have one created and a secret added )..Click the KeyVault, then go to Access policies:

Then, you will need to click the “+ Add Access Policy” to create a new policy for our MSI’s. We need the Get for Key and Secret permissions for this blog:

Next, we need to click on the “Select Principal” to add our MSI’s ( you can search by name ) — you can only add one at a time. You should see each MSI listed in the Access Policies blade now. If not, then it hasn’t been added and won’t have access to the keyvault:

Now for the code: to start, you will need to install the following nuget libraries along with the dependencies that are automatically installed when you choose the packages:


  • Azure.Identity
  • Azure.Security.KeyVault.Secrets

You will then need the following Imports at the top of your code file:


  • Imports Azure.Core
  • Imports Azure.Identity
  • Imports Azure.Security.KeyVault.Secrets

The key to using the Managed Identities ( system assigned or user assigned ) is setting a ManagedIdentityCredential. For a system assigned one, you just need to set a credential variable to a New ManagedIdentityCredential. For a user assigned credential, you will need to set the credential variable to a New ManagedIdentityCredential( id ) with the id = to the client id for the user assigned credential.

    Sub Get_Secret_With_UserAssigned_MSI()
        Console.WriteLine($"{vbCrLf}Getting secret with user assigned msi:")

        Dim credential As New ManagedIdentityCredential(userAssignedClientId)

        Dim client As SecretClient = New SecretClient(keyVaultUri, credential)
        Dim secret As KeyVaultSecret = client.GetSecret(keyVaultSecretName).Value

        Console.WriteLine($"KeyVault Secret = {secret.Value}{vbCrLf}")

    End Sub

    Sub Get_Secret_With_SystemAssigned_MSI()
        Console.WriteLine($"{vbCrLf}Getting secret with system assigned msi:")

        Dim credential As New ManagedIdentityCredential()

        Dim client As SecretClient = New SecretClient(keyVaultUri, credential)
        Dim secret As KeyVaultSecret = client.GetSecret(keyVaultSecretName).Value

        Console.WriteLine($"KeyVault Secret = {secret.Value}{vbCrLf}")
    End Sub

The equivalent in C#:

        static void Get_Secret_With_UserAssigned_MSI()
        {
            Console.WriteLine($"\nGetting secret with user assigned msi:");

            ManagedIdentityCredential credential = new ManagedIdentityCredential(userAssignedClientId);

            SecretClient client = new SecretClient(keyVaultUri, credential);
            KeyVaultSecret secret = client.GetSecret(keyVaultSecretName).Value;

            Console.WriteLine($"KeyVault Secret = {secret.Value}\n");
        }

        static void Get_Secret_With_SystemAssigned_MSI()
        {
            Console.WriteLine($"\nGetting secret with system assigned msi:");

            ManagedIdentityCredential credentail = new ManagedIdentityCredential();

            SecretClient client = new SecretClient(keyVaultUri, credentail);
            KeyVaultSecret secret = client.GetSecret(keyVaultSecretName).Value;

            Console.WriteLine($"KeyVault secret = {secret.Value}\n");
        }

Download both samples from my GitHub ( linked at the beginning of this blog ) and plug in your MSI information and give it a try after configuring the resource, the keyvault and the MSI’s! In both samples, you will need to change the values for the variables userAssignedClientId, keyVaultSecretName and keyVaultUri to match your environment.

Sample Output:

For more reading, see this document about the Managed Identities — there is also a good video on that page.

Getting Azure Key Vault secret with Azure.Identity and Azure.Security.KeyVault

In my last post, I talked about using ADAL (now deprecated) with the KeyVaultClient class to get an access token using OAuth2 Client Credentials Grant flow and query Azure Key Vault with that access token. In this post, I’ll talk about using a couple of new classes in the Azure SDK for .NET library to accomplish the same goal. We will use Azure.Identity name space for our Azure AD token acquisition with either a certificate or a secret and the SecretClient class to manage Azure Key Vault secret. Refer to my last post for setting up an Azure Key Vault and Application Registration. Below is the code sample showing how this is done.

using Azure.Core.Diagnostics;
using Azure.Identity;
using Azure.Security.KeyVault.Secrets;
using System;
using System.Diagnostics.Tracing;
using System.Security.Cryptography.X509Certificates;

namespace ConsoleAppKV
{
    class Program
    {
        static void Main(string[] args)
        {
// this is only for diagnostics reason
            AzureEventSourceListener listener = AzureEventSourceListener.CreateConsoleLogger(EventLevel.Verbose);
            SecretClientOptions options = new SecretClientOptions()
            {
                Diagnostics =
                    {
                        IsLoggingContentEnabled = true,
                        IsLoggingEnabled = true
                    }
            };

            String keyVaultUrl = "https://<vault name>.vault.azure.net/";
            String certPath = $"C:\\<path_to_pfx_file>\\cert.pfx";
            String tenantID = "<tenant ID>";
            String clientID = "<Application ID>";
            String pfxpassword = "<password for pfx file>";
            String secret = "<Application Secret>";
// using certificate
            X509Certificate2 cer = new X509Certificate2(certPath, pfxpassword, X509KeyStorageFlags.EphemeralKeySet);

            var credential = new ClientCertificateCredential(tenantID, clientID, cer);

// using secret
            var credential2 = new ClientSecretCredential(tenantID, clientID, secret);

// authenticate with a secret
            var client = new SecretClient(new Uri(keyVaultUrl), credential2,options);
// use the below if you want to authenticate with a certificate:
//            var client = new SecretClient(new Uri(keyVaultUrl), credential,options);

// as mentioned above, if you don't want to turn on diagnostics then use the following to create the SecretClient
// var client = new SecretClient(new Uri(keyVaultUrl), credential);
            KeyVaultSecret result = client.GetSecret("<secret name>");
            Console.WriteLine(result.Value);
        }
    }
}

References

Azure Key Vault Developer’s Guide

Azure.Security.KeyVault.Secrets samples for .NET – Code Samples | Microsoft Docs

Azure.Security.KeyVault.Certificates samples for .NET – Code Samples | Microsoft Docs

Azure.Security.KeyVault.Keys samples for .NET – Code Samples | Microsoft Docs

Exploring AzureServiceTokenProvider class with Azure Key Vault and Azure SQL

The AzureServiceTokenProvider class from the Nuget package Microsoft.Azure.Services.AppAuthentication can be used to obtain an access token.  When running in Azure it can also utilize managed identities to request an access token.  In this post I’ll focus on using this class to get an access token for Azure Key Vault.  Keep in mind that you can also use this class to obtain an access token for any Azure resources integrated with Azure Active Directory.  Below are some code sample showing a couple of ways to use this class to get an access token and call Azure Key Vault:

Note: Before trying out the following, you should make sure the signed-in principal (application or user) has access to Azure Key Vault.  See my previous blog post for more info on this and the Azure Key Vault documentation.  For example, I have configured my Azure Key Vault to allow access to the following 2 users and 2 Applications in the Azure Key Vault’s Access Policies blade:

using Microsoft.Azure.Services.AppAuthentication;
using Microsoft.Azure.KeyVault;
// ...
var azureServiceTokenProvider = new AzureServiceTokenProvider();
var kv = new KeyVaultClient(new KeyVaultClient.AuthenticationCallback(azureServiceTokenProvider.KeyVaultTokenCallback));
var secret = await kv.GetSecretAsync("https://blogkv123.vault.azure.net", "SQLPassword").ConfigureAwait(false);

or

using Microsoft.Azure.Services.AppAuthentication;
using Microsoft.Azure.KeyVault;
// ...
var azureServiceTokenProvider = new AzureServiceTokenProvider();
string accessToken = await azureServiceTokenProvider.GetAccessTokenAsync("https://vault.azure.net");
using (var client = new HttpClient())
{
    var url = " https://blogkv123.vault.azure.net/secrets/SQLPassword";
    client.DefaultRequestHeaders.Add("Authorization", "Bearer " + accessToken);
    var response = await client.GetAsync(url);
    // Parse JSON response.
    ....
}

In the above code sample, we are using the default constructor of the AzureServiceTokenProvider class by instantiating an instance of this class without providing a connection string (which usually contains tenant and application ID info).  Later on, we will talk about how use a connection string with this class.  The default constructor tries to get an access token from the following methods:

  1. Managed Identities using client credentials grant flow – this option only works if the code is run in Azure environment, for example Azure Virtual Machine , Azure App Service, etc…

Note:  this option requires that the Azure resource has support for Managed Identities and Managed identity is enabled. For a list of Azure resources that support managed identities see https://docs.microsoft.com/en-us/azure/active-directory/managed-identities-azure-resources/services-support-managed-identities

  1. Visual Studio
  2. Azure CLI or Active Directory Integrated Authentication

If all 3 methods fail, you can get an Exception like the following:

Exception thrown: ‘Microsoft.Azure.Services.AppAuthentication.AzureServiceTokenProviderException’ in System.Private.CoreLib.dll

Parameters: Connection String: [No connection string specified], Resource: https://vault.azure.net, Authority: https://login.windows.net/<tenant ID>. Exception Message: Tried the following 3 methods to get an access token, but none of them worked.

Parameters: Connection String: [No connection string specified], Resource: https://vault.azure.net, Authority: https://login.windows.net/<tenant ID>. Exception Message: Tried to get token using Managed Service Identity. Unable to connect to the Managed Service Identity (MSI) endpoint. Please check that you are running on an Azure resource that has MSI setup.

Parameters: Connection String: [No connection string specified], Resource: https://vault.azure.net, Authority: https://login.windows.net/<tenant ID>. Exception Message: Tried to get token using Visual Studio. Access token could not be acquired.

Parameters: Connection String: [No connection string specified], Resource: https://vault.azure.net, Authority: https://login.windows.net/<tenant ID>. Exception Message: Tried to get token using Azure CLI. Access token could not be acquired. ERROR: No subscription found. Run ‘az account set’ to select a subscription.

For option 1, either System MSI or User-Assigned MSI can be used.  Refer to the appropriate Azure Resource documentation for how to do this.  As mentioned above, remember to give MSI access to Azure Key Vault.

Below are a couple of screen shots showing how I configured my Azure VM MSI using either System MSI or User-Assigned MSI (see more info about User MSI Connection String later on in this blog):

A good way to test if MSI is enabled for the Azure VM is by running the following command from the Powershell window in the VM:

Invoke-WebRequest -Uri ‘http://169.254.169.254/metadata/identity/oauth2/token?api-version=2018-02-01&resource=https%3A%2F%2Fvault.azure.net’ -Headers @{Metadata=”true”}

For Azure App Service, the MSI setting is similar in the Azure App Service’s Identity blade:

To test for MSI in Azure App Service you can create a file called ‘test.ps1’ with the following Powershell code and run the file from the Azure Web App’s kudu console:

$resourceURI = "https://vault.azure.net"
$tokenAuthURI = $env:MSI_ENDPOINT + "?resource=$resourceURI&api-version=2017-09-01"
$tokenResponse = Invoke-RestMethod -Method Get -Headers @{"Secret"="$env:MSI_SECRET"} -Uri $tokenAuthURI
$accessToken = $tokenResponse.access_token
Echo $accessToken

And you should see output like the following:

For option 2, refer to the documentation at https://docs.microsoft.com/en-us/azure/key-vault/service-to-service-authentication for instruction under “Authentication with Visual Studio” section,

For option 3, make sure you have Azure CLI v2.0.12 or later installed (to find out what version you have installed run az –version command)

You will need to sign in from the az cli window first before running your application code.  You can either sign in by a user account or by an application (service principal) account

Sign in with a user account:

  1. Run az login to sign in
  2. Run az account get-access-token –resource https://vault.azure.net to verify you can get an access token for Azure Key Vault

Sign in with an Application (or Service Principal):

az login –service-principal -u <app id> –password <app secret> –tenant <tenant-id> –allow-no-subscriptions

Using AzureServiceTokenProvider with your own Application…

So far, we have only discussed calling AzureServiceTokenProvider class with no argument (the default constructor).  When deploying the code to run in Azure service, it mainly relies on using Managed Identity (MSI) configured for that service to get an access token.  Both the Azure CLI and Visual Studio method are intended only for local development effort so they are not suitable for production environment.  The problem with using MSI is that the Azure resource must support MSI and not every resource has this capability. 

Besides using Managed Identities, you can also configure your own Application Registration and use that application for the AzureServiceTokenProvider class to acquire an access token.  This can be accomplished using a Connection String to specify our tenant and application info detail.  See code example below for how to do this:

var azureServiceTokenProvider1 = new AzureServiceTokenProvider(“RunAs=App;AppId=<Application ID>;TenantId=<Tenant Name>.onmicrosoft.com;AppKey=<App Secret>”);

Note: For User-Assigned Managed Identity, use the connection string as followed:

var azureServiceTokenProvider1 = new AzureServiceTokenProvider(“RunAs=App;AppId=<User-Assigned MSI Application ID>”);

Set up the Connection String via an environment variable:

Instead of passing in the connection string in the AzureServiceTokenProvider class, you can create an environment variable (via Visual Studio Project Properties) called AzureServicesAuthConnectionString and set the connection string as its value:

Once this environment variable is set, you can call the AzureServiceTokenProvider with its default constructor:

var azureServiceTokenProvider = new AzureServiceTokenProvider();

For debugging purpose, I use the following code in my controller to get more info about the token or Exception Info:

public async System.Threading.Tasks.Task<ActionResult> Privacy()
        {
            // Instantiate a new KeyVaultClient object, with an access token to Key Vault
            var azureServiceTokenProvider1 = new AzureServiceTokenProvider();
             var azureServiceTokenProvider2 = new AzureServiceTokenProvider("RunAs=App;AppId=<Application ID>");
            // var azureServiceTokenProvider2 = new AzureServiceTokenProvider();
            // string accessToken = await azureServiceTokenProvider2.GetAccessTokenAsync("https://management.azure.com/").ConfigureAwait(false);
            // var azureServiceTokenProvider1 = new AzureServiceTokenProvider("RunAs=App;AppId=<Application ID>;TenantId=<Tenant Name>.onmicrosoft.com;AppKey=<Application Secret>");
            try
            {
                var kv = new KeyVaultClient(new KeyVaultClient.AuthenticationCallback(azureServiceTokenProvider1.KeyVaultTokenCallback));
                var secret = await kv.GetSecretAsync("https://blogkv123.vault.azure.net", "SQLPassword").ConfigureAwait(false);
                ViewBag.Secret = $"Secret: {secret.Value}";
            }
            catch (Exception ex)
            {
                ViewBag.Error = $"Something went wrong: {ex.Message}";
                Debug.WriteLine(ex.Message);
            }
            ViewBag.Principal = azureServiceTokenProvider1.PrincipalUsed != null ? $"Principal Used: {azureServiceTokenProvider1.PrincipalUsed}" : string.Empty;

            try
            {
                string accessToken = await azureServiceTokenProvider2.GetAccessTokenAsync("https://vault.azure.net").ConfigureAwait(false);
                ViewBag.AccessToken = $"Access Token: {accessToken}";
            }
            catch (Exception e)
            {
                Debug.WriteLine(e.Message);
            }
            // Debug.WriteLine(ToString());
            return View();
        }

And here is the code for the View Page:

@{
    ViewData["Title"] = "Privacy Policy";
}
<h1>@ViewData["Title"]</h1>

<div>

    <div>@ViewBag.AccessToken</div>

    <div>@ViewBag.Secret</div>

    <div>@ViewBag.Principal</div>

    <div>@ViewBag.Error</div>


</div>

<p>Use this page to detail your site's privacy policy.</p>

Beware of Token Lifetime

Usually Managed Identities (System or User-Assigned) access token is valid up to 8 hours. Make sure your application code checks for token validity and renewing the token as needed to avoid unpredictable behavior. A typical problem that can occur is intermittent Database connectivity issue, for instance the one documented here. An Azure App Service using Managed Identity access token to connect to an Azure SQL Database with the following Entity Framework code:

public class MyDbContext : DbContext
    {
        public MyDbContext(DbContextOptions options) : base(options)
        {
            var conn =  (SqlConnection) this.Database.GetDbConnection();
            conn.AccessToken = (new AzureServiceTokenProvider()).GetAccessTokenAsync("https://database.windows.net/").Result;
        }
        public DbSet<Item> Items { get; set; }
    }

//Startup.cs
services.AddDbContext<ToDoDbContext>(options =>
{
    var connStr = Configuration["ConnectionString"];
    options.UseSqlServer(connStr);
});

The code works fine initially but after some time it starts throwing the following exception:

System.Data.SqlClient.SqlException (0x80131904): Login failed for user 'NT AUTHORITY\ANONYMOUS LOGON'.
   at System.Data.SqlClient.SqlInternalConnectionTds..ctor(DbConnectionPoolIdentity identity, SqlConnectionString connectionOptions, SqlCredential credential, Object providerInfo, String newPassword, SecureString newSecurePassword, Boolean redirectedUserInstance, SqlConnectionString userConnectionOptions, SessionData reconnectSessionData, Boolean applyTransientFaultHandling, String accessToken)
   at System.Data.SqlClient.SqlConnectionFactory.CreateConnection(DbConnectionOptions options, DbConnectionPoolKey poolKey, Object poolGroupProviderInfo, DbConnectionPool pool, DbConnection owningConnection, DbConnectionOptions userOptions)
   at System.Data.ProviderBase.DbConnectionFactory.CreatePooledConnection(DbConnectionPool pool, DbConnection owningObject, DbConnectionOptions options, DbConnectionPoolKey poolKey, DbConnectionOptions userOptions)
   at System.Data.ProviderBase.DbConnectionPool.CreateObject(DbConnection owningObject, DbConnectionOptions userOptions, DbConnectionInternal oldConnection)
   at System.Data.ProviderBase.DbConnectionPool.UserCreateRequest(DbConnection owningObject, DbConnectionOptions userOptions, DbConnectionInternal oldConnection)
   at System.Data.ProviderBase.DbConnectionPool.TryGetConnection(DbConnection owningObject, UInt32 waitForMultipleObjectsTimeout, Boolean allowCreate, Boolean onlyOneCheckConnection, DbConnectionOptions userOptions, DbConnectionInternal& connection)
   at System.Data.ProviderBase.DbConnectionPool.TryGetConnection(DbConnection owningObject, TaskCompletionSource`1 retry, DbConnectionOptions userOptions, DbConnectionInternal& connection)
   at System.Data.ProviderBase.DbConnectionFactory.TryGetConnection(DbConnection owningConnection, TaskCompletionSource`1 retry, DbConnectionOptions userOptions, DbConnectionInternal oldConnection, DbConnectionInternal& connection)
   at System.Data.ProviderBase.DbConnectionInternal.TryOpenConnectionInternal(DbConnection outerConnection, DbConnectionFactory connectionFactory, TaskCompletionSource`1 retry, DbConnectionOptions userOptions)
   at System.Data.ProviderBase.DbConnectionClosed.TryOpenConnection(DbConnection outerConnection, DbConnectionFactory connectionFactory, TaskCompletionSource`1 retry, DbConnectionOptions userOptions)
   at System.Data.SqlClient.SqlConnection.TryOpen(TaskCompletionSource`1 retry)
   at System.Data.SqlClient.SqlConnection.Open()
   at Microsoft.EntityFrameworkCore.Storage.RelationalConnection.OpenDbConnection(Boolean errorsExpected)
ClientConnectionId:a3a93762-2a94-473b-ba4b-9c3da55d669f
Error Number:18456,State:1,Class:14

The root cause of the above error is due to expired token being used. The Application code above only retrieves the access token once during DB Context initialization and keeps using the same token beyond its lifetime. Check out the github issue above (https://github.com/dotnet/efcore/issues/19808) for ideas on how to work around this issue.

References:

https://stackoverflow.com/questions/14627399/setting-authorization-header-of-httpclient

https://www.rahulpnath.com/blog/authenticating-with-azure-key-vault-using-managed-service-identity/

https://docs.microsoft.com/en-us/samples/azure-samples/app-service-msi-keyvault-dotnet/keyvault-msi-appservice-sample/

https://docs.microsoft.com/en-us/samples/azure-samples/app-service-msi-keyvault-dotnet/keyvault-msi-appservice-sample/

https://docs.microsoft.com/en-us/azure/app-service/overview-managed-identity?context=azure%2Factive-directory%2Fmanaged-identities-azure-resources%2Fcontext%2Fmsi-context&tabs=powershell

https://docs.microsoft.com/en-us/azure/key-vault/service-to-service-authentication


Update 4/25/2020 – Added information about token life time and SQL Connection error

Retrieving Azure Key Vault Secret using System MSI in an Azure VM in Python

Introduction

This is a walk-through showing how to use System Managed Service Identity (MSI) from an Azure VM to retrieve an Azure Key Vault secret in python.

Pre-requisite

To use the steps in this walk-through you need to have the following:

  1. Azure VM
  2. Azure Key Vault
  3. Python is already installed in the Azure VM (can be downloaded at https://www.python.org/downloads/)

The steps

  1. Enable System MSI for the Azure VM in the Azure portal (on the selected Azure VM blade -> Go to the Identity section -> change the Status to ‘On’ in the System assigned tab -> Save)

  2. Install Azure Key Vault for python in the Azure VM

    RDP to the Azure Key Vault machine and open a command line and run “pip install azure-keyvault

  3. Configure the System MSI to have access to your Azure Key Vault in the Azure portal (from the selected Azure Key vault -> Access policies -> Add new)

    In the ‘Select principal’ section select the Azure VM MSI that you just created in step 1 above. The MSI has the same name as the Azure VM. Also remember to give appropriate permissions (Key permissions, secret permissions, and certificate permissions) to the MSI depending on what you want to do with the MSI. In this walk-through I’ll use the MSI to retrieve the secret so it’s sufficient to give just give ‘Get’ access in the secret permissions section.

  1. Create a ‘test.py’ python script file with the following content:
from azure.keyvault import KeyVaultClient
from msrestazure.azure_active_directory import MSIAuthentication

credentials = MSIAuthentication(resource='https://vault.azure.net')
kvclient = KeyVaultClient(credentials)
res = kvclient.get_secret("https://<vault name>.vault.azure.net/", "<secret name>", "").value
print(res)
  1. Run the above script and you should get your secret value printed out

Conclusion

The above step demonstrates a simple way to use System MSI to retrieve an Azure Key Vault secret. The script use the MSIAuthentication class for MSI authentication to Azure AD and get an access token for Azure key vault.

References

How to use managed identities for Azure resources on an Azure VM with Azure SDKs

Azure Key Vault Developer’s Guide

Walkthrough: how to retrieve an Azure Key Vault secret from an Azure Function App using client credentials flow with certificate

Introduction:

This post builds on the information from the previous post and I will assume that you already have an Azure Key Vault, an AAD Application registration, and a certificate file. We will cover the following steps in this blog in order to use a certificate from an Azure Function App:

  1. Create an Azure Function App
  2. Upload the certificate to the Function App
  3. Configure the Function App to load certificate file
  4. Create an Azure Function to consume the certificate

Create an Azure Function App

From the Azure Market Place in the Azure portal, create an Azure Function App. The Hosting Plan can either be Consumption Plan or App Service Plan.

Upload the certificate to the Azure Function App

Go to the Function App resource we just created => click on Platform features tab => click on SSL link

From the SSL blade => click on Private Certificates (.pfx) tab => click the Upload Certificate link

Go through the Certificate Upload wizard to provide a pfx file and password. Once the upload is complete, the certificate info should appear under the Private Certificate section

Configure the Function App to load the certificate

From the Function App blade, click on the Application settings link under the Platform features tab

Under Application settings section, add a new setting called WEBSITE_LOAD_CERTIFICATES and set the value to be the certificate thumbprint. Click on Save button to save the new setting

Create an Azure Function

From Visual Studio 2017, create a new Azure Functions project. If you don’t see the “Azure Functions” template, you may need to install “Azure Functions and Web Jobs Tools” extension. See https://docs.microsoft.com/en-us/azure/azure-functions/functions-develop-vs for more info.

For the Function trigger, I just choose Timer trigger for the purpose of this blog. You an choose any trigger you like. Trigger is just a mean to invoke an Azure Function. If you have a storage account then go ahead and configure the storage account for the Function under Storage Account setting. The schedule setting uses CRON expression to define a timer schedule for the Function App. The prepopulated expression 0 */5 * * * * means that the Function is invoked every 5 minutes.

Now we need to write the code for this Function:

  1. Install the following Nuget packages from the Package Manager Console:

Install-Package Microsoft.IdentityModel.Clients.ActiveDirectory

Install-Package Microsoft.Azure.KeyVault

  1. Replace the code in Function1.cs with the following code:

[gist id=”069082b4a4a2df7b0e3f9ef4ccf4498b” file=”Function1.cs”]

  1. Build and publish this Azure Function to our Azure Function App by right-click on the Project name and select “Publish…”

    Note: If you have not done this already, make sure you log into Visual Studio with your Azure AD account.


Select the target to be our existing Azure Function App and click “Publish”

Select the right Azure Function App under the right Resource Group and click OK to publish

Once the publishing is finished, we should see our Function 1 appearing in the Azure portal. You can click on the “Run” button to see the output in the Logs section at the bottom.

References

https://docs.microsoft.com/en-us/azure/azure-functions/functions-develop-vs

https://azure.microsoft.com/en-us/blog/using-certificates-in-azure-websites-applications/

Walkthrough: how to retrieve an Azure Key Vault secret from a console app using client credentials flow with certificate

Introduction

This is a code walkthrough to show you how to create a .Net console application to authenticate to Azure Active Directory using OAuth2 Client Credentials flow to get an access token to Azure Key Vault. It then uses the access token to call Azure Key Vault to get a secret. The following steps will be performed in this post:

  1. Create an Azure Key Vault
  2. Create a new self-signed certificate to use in client credentials flow
  3. Create a new Application Registration
  4. Create a new console app to retrieve a secret from Azure Key Vault

Create an Azure Key Vault

You can create an Azure Key Vault from the Azure portal if you don’t have one already. Refer to https://docs.microsoft.com/en-us/azure/key-vault/key-vault-get-started for more info. I use the Powershell script below to create a new Azure Key Vault and then set a new secret.

[gist id=”f712488ddd72ab9eed7c6b0e2115ce61″ file=”CreateKeyVault.ps1″]

The above script creates an Azure Key Vault called BlogKV123 with a secret called SQLPassword:

Create a new self-signed certificate

I use the Powershell script below to create a new exportable self-signed certificate. See https://docs.microsoft.com/en-us/azure/key-vault/key-vault-use-from-web-application for more info.

[gist id=”e5f4671e35a97f3b3e8a579b9a2c05b9″ file=”CreateSelfSignedCert.ps1″]

Create a new Application Registration

We need to create a new Application Registration in the Azure Active Directory’s App Registration blade and then upload the certificate cer file created above to the Keys section of the Application. In addition, we also need to give our Application (really its Service Principal) access permission to the Azure Key Vault to read its secret info. I use the following Powershell script from https://docs.microsoft.com/en-us/azure/key-vault/key-vault-use-from-web-application to do this.. Take note of the certificate thumbprint output below as you will need it later for the application code.

[gist id=”c5a8c49ed9e831e98925e25cf3b2ffd7″ file=”CreateAADAppwithKeyVault.ps1″]

The script above should create a “Web app / API” Application type and upload the certificate file to the Application in the Keys => Public Keys section as in the screen shot below.  The thumbprint info should match the output above in the Powershell console.

Take note of the Application ID and the thumbprint as you will use it in your console app later.

Over in the Azure Key Vault blade, you should see the Service Principal for our Application listed in the Access policies section with all the given secret operation permission

Create a Console Application

  1. From Visual Studio 2017 Create a new .Net console app:

  1. Install the following Nuget packages from the Package Manager Console:

Install-Package Microsoft.IdentityModel.Clients.ActiveDirectory

Install-Package Microsoft.Azure.KeyVault

  1. Replace the code in Program.cs with the following code (Use both the Application ID and the certificate thumbprint from above on line 14 and 15 respectively):

[gist id=”8e986c31c71da41d696ac4d4b175df2a” file=”Program.cs”  ]

  1. Run the application and you should get the output ‘Pa$$w0rd’ printed out.

References:

https://docs.microsoft.com/en-us/azure/key-vault/key-vault-get-started

https://www.rahulpnath.com/blog/authenticating-a-client-application-with-azure-key-vault/

https://docs.microsoft.com/en-us/azure/key-vault/key-vault-use-from-web-application