At one point in recent history, VB.Net was one of the most popular development languages around. In fact, there are many legacy applications written in VB.Net and even still, VB.Net is still in the top 10 languages ( source: https://www.techworm.net/2018/02/popular-programming-languages-2018-according-tiobe-pypl.html ). I will show a simple console application using VB.Net to authenticate using MSAL.Net
Of course, the first step, as in everything Azure, starts with setting up an app registration to use for Authentication. For this demonstration, I created a single tenant app registration with the following Redirect URI configured ( urn:ietf:wg:oauth:2.0:oob ):
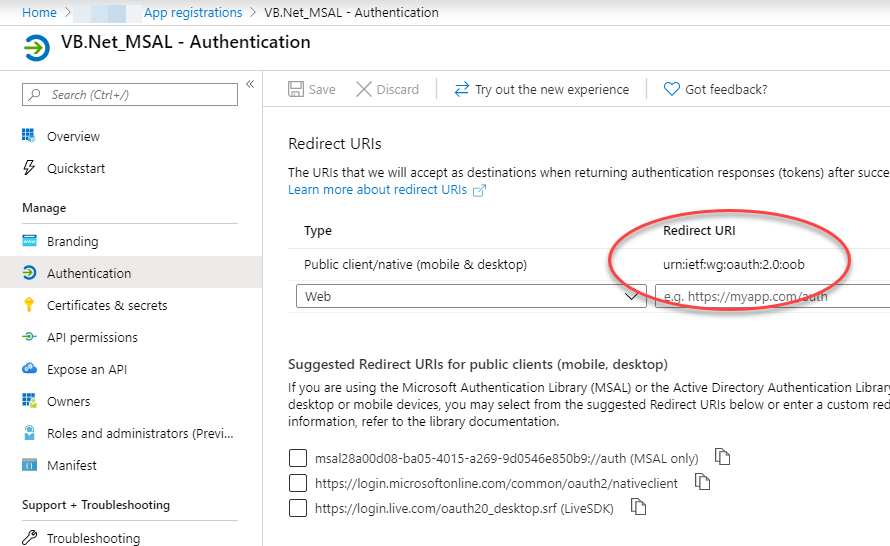
There is nothing else special about this app registration.
Now, for the code. To start with, you must install the Microsoft.Identity.Client from the Nuget package manager. I will present to you sample VB.Net code that performs authentication synchronously, then asynchronously.
Imports Microsoft.Identity.Client

Module Module1

    Private _accessToken As String = String.Empty
    Private Const client_id As String = "{client_id}" '<-- enter the client_id guid here
    Private Const tenant_id As String = "{tenant_id}" '<-- enter either your tenant id here
    Private authority As String = $"https://login.microsoftonline.com/{tenant_id}"
    Private scopes As New List(Of String)

    Sub Main()

        scopes.Add($"{client_id}/.default")

        Console.WriteLine("Starting Synchronous Sample...")

        SyncSample()

        Console.WriteLine($"{Environment.NewLine}End Synchronous Sample...{Environment.NewLine}Start Asynchronous Sample...")

        AsyncSample()

        Console.WriteLine($"{Environment.NewLine}End Asynchronous Sample.{Environment.NewLine}Press any key to close...")
        Console.ReadKey()

    End Sub

#Region "Synchronous Code"


    Private Sub SyncSample()
        If Login() Then
            Console.WriteLine(_accessToken)
        Else
            Console.WriteLine("Not Authorized")
        End If
    End Sub

    Private Function Login() As Boolean

        Dim publicClientApp As IPublicClientApplication
        publicClientApp = PublicClientApplicationBuilder.Create(client_id).WithAuthority(authority).Build()

        Dim accounts As IEnumerable(Of IAccount) = publicClientApp.GetAccountsAsync().Result()
        Dim firstAccount As IAccount = accounts.FirstOrDefault()
        Dim authResult As AuthenticationResult

        Try
            authResult = publicClientApp.AcquireTokenSilent(scopes, firstAccount).ExecuteAsync().Result()
        Catch e As MsalUiRequiredException
            Try
                authResult = publicClientApp.AcquireTokenInteractive(scopes).ExecuteAsync().Result()
            Catch ex As Exception
                'user cancelled
                Return False
            End Try
        Catch ex As Exception
            Console.WriteLine($"Auth Exception: {ex.Message}")
            Return False
        End Try

        _accessToken = authResult.AccessToken

        Return True

    End Function

#End Region

#Region "Asynchronous Code"

    Private Sub AsyncSample()

        Dim task As Task(Of Boolean) = LoginTask()

        If task.Result() Then
            Console.WriteLine(_accessToken)
        Else
            Console.WriteLine("Not Authorized")
        End If
    End Sub

    Private Async Function LoginTask() As Task(Of Boolean)
        Dim publicClientApp As IPublicClientApplication
        publicClientApp = PublicClientApplicationBuilder.Create(client_id).WithAuthority(authority).Build()

        Dim accounts As IEnumerable(Of IAccount) = Await publicClientApp.GetAccountsAsync()
        Dim firstAccount As IAccount = accounts.FirstOrDefault()
        Dim authResult As AuthenticationResult

        Dim tryInteractive As Boolean = False

        Try
            authResult = Await publicClientApp.AcquireTokenSilent(scopes, firstAccount).ExecuteAsync()
            _accessToken = authResult.AccessToken
        Catch e As MsalUiRequiredException
            tryInteractive = True
        End Try

        If tryInteractive Then
            Try
                authResult = Await publicClientApp.AcquireTokenInteractive(scopes).ExecuteAsync()
                _accessToken = authResult.AccessToken
            Catch ex As Exception
                Return False
            End Try
        End If

        Return _accessToken <> String.Empty

    End Function

#End Region

End Module
Although there are quite a few differences from our C# samples, we can still leverage MSAL in our VB.Net code as well with some minor changes.
UPDATE: 06/18/2020
To clear up some confusion about the redirect URI, please try selecting the default MSAL redirect from the portal that is created when you create the app registration and after selecting that by clicking the checkbox, click the save button:
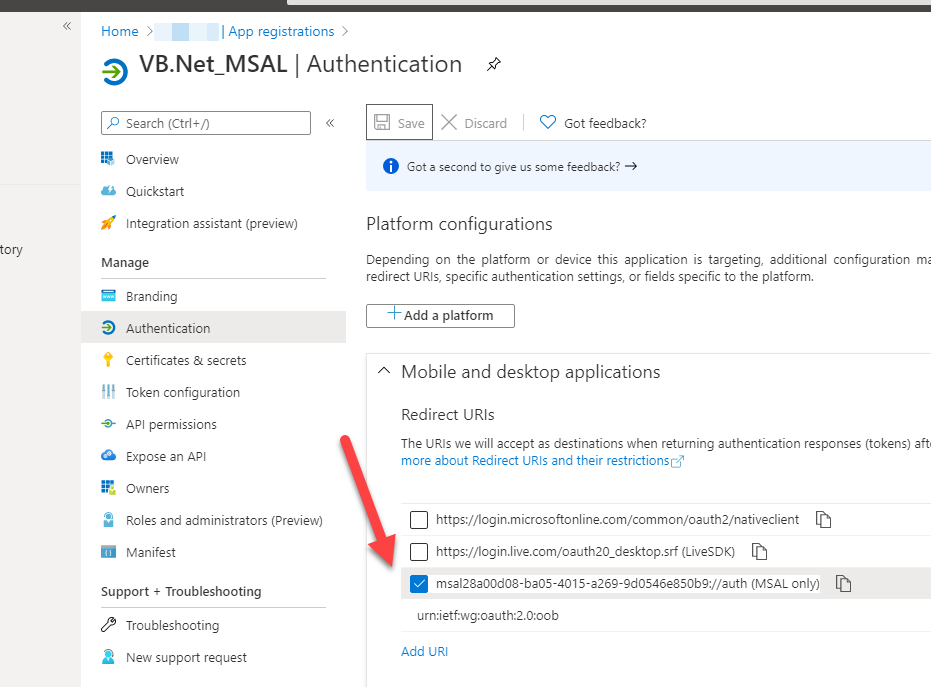
Then, modify your code to add the .WithRedirectUri parameter like so:
publicClientApp = PublicClientApplicationBuilder.Create(client_id).WithAuthority(authority).WithRedirectUri(“msal28a00d08-ba05-4015-a269-9d0546e850b9://auth”).Build()
The redirect URI I had in this post, I obtained to see what the default was sent during authentication by running fiddler, in an attempt to make this more universal for everyone, which apparently isn’t the case 🙂