Pre-requisite:
The ASP.NET Core Web API project in this tutorial uses Visual Studio 2017 with .Net Core runtime version 2.2
Application Registration:
We will need to create an App Registration for the web API and an App Registration for the client app calling the web API in Azure Active Directory.
Web API:
From the Azure portal, navigate to the Azure Active Directory blade -> App registrations -> New registration to create an app registration.
For the account type, I choose the first option ‘accounts in this organizational directory only’ for simplicity.
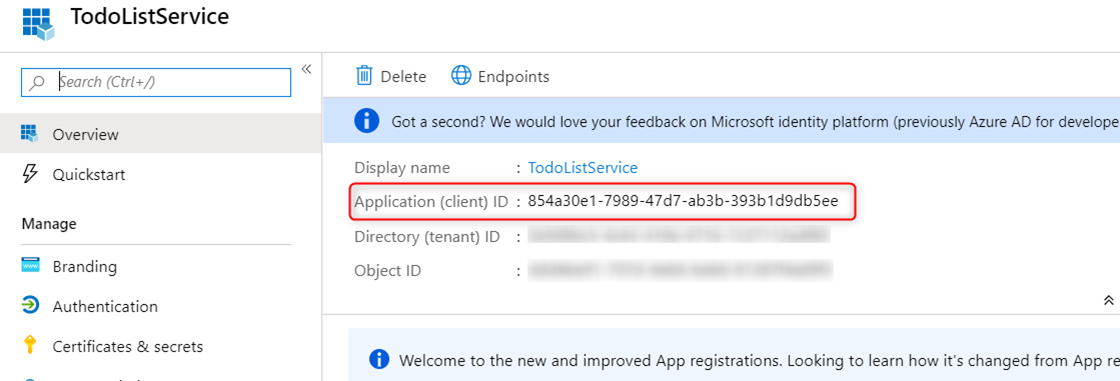
Take note of the Application ID as you will need it later for the web API app
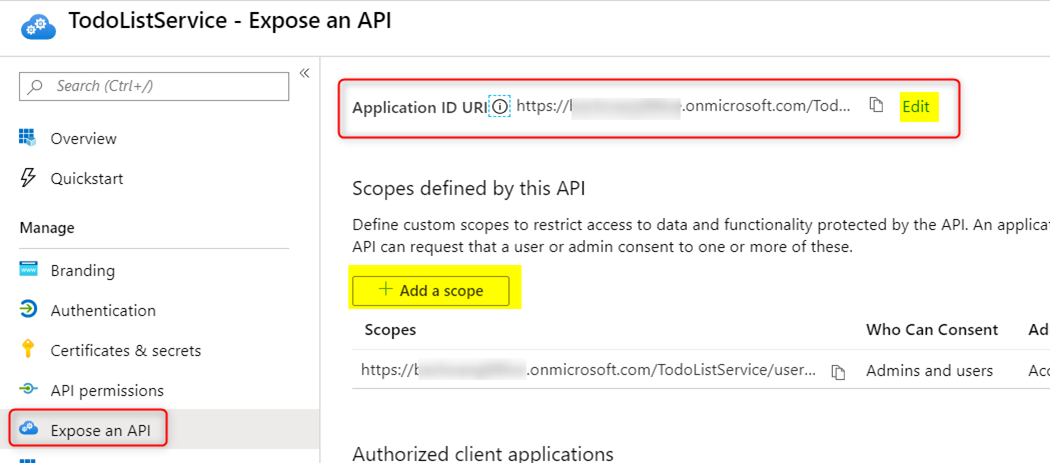
In the ‘Expose an API’ blade make sure you add a scope and set the ‘Application ID URI’ field. Take note of this as we will need it for the API App and configuring Postman later
Client App:
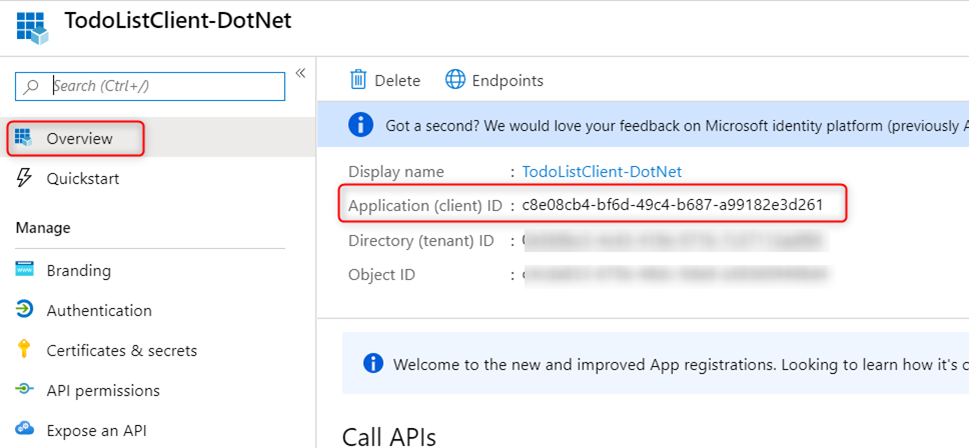
Use the same step as above to create a new app registration for the client app. There is no need to configure the ‘Application ID URI’ in the ‘Expose an API’ blade. Again take note of the Application ID as you will need it later to configure Postman
In the API permissions blade, click on ‘Add a permission’ to add the permission for the web API we created earlier. You also need to click on ‘Grant admin consent’ button to grant admin consent for the web API permission. This step is important since we will be using Postman to get an access token for the web API using client credentials grant flow, which requires the permission to be admin consented ahead of time.

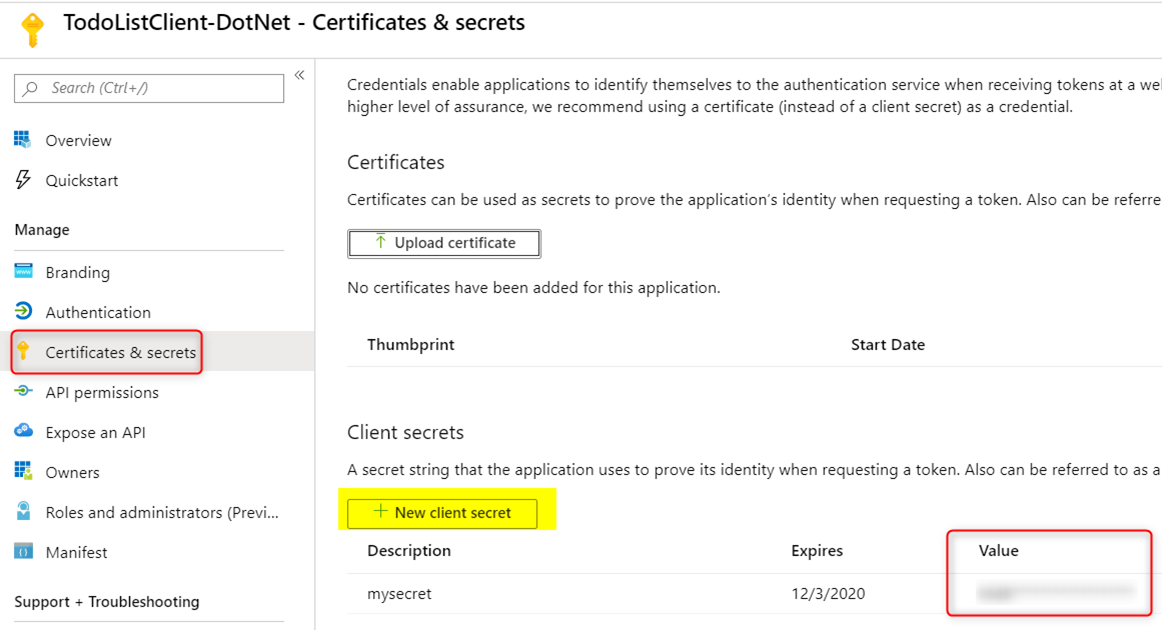
In the ‘Certificates & secrets’ blade, click on the ‘New client secret’ button to create a new secret. Take note of this secret value as this is only displayed only once upon creation. Once you navigate away from this page, the secret value will not be shown.
Our web API project:
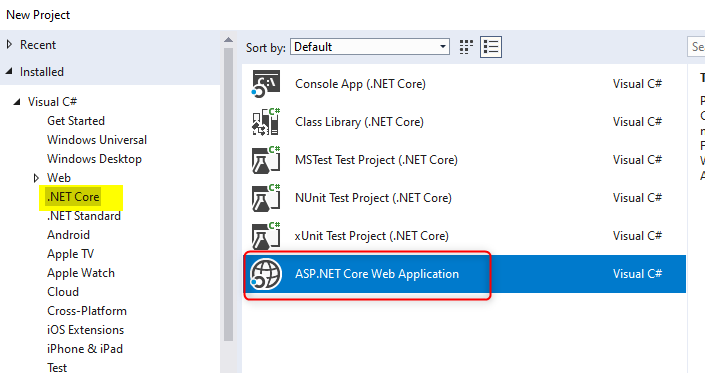
Using Visual Studio 2017, create a new ASP.NET Core Web Application project under Visual C#
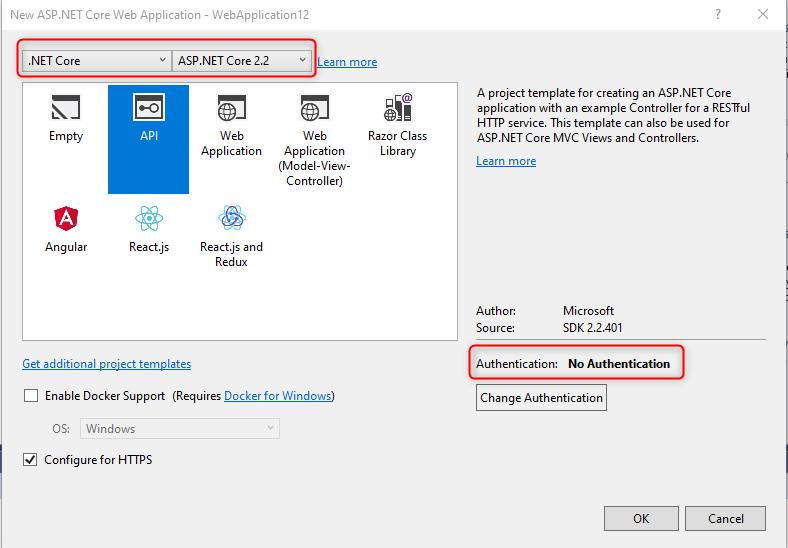
In the next wizard, select API for the project type. As mentioned above, I am using ASP.NET Core 2.2 version and ‘No Authentication’ configured initially.
Make the following changes in the Startup.cs file:
- add the statement using Microsoft.AspNetCore.Authentication.JwtBearer; at the top so it should look similar to this:
using System.Collections.Generic;
using Microsoft.AspNetCore.Authentication.JwtBearer;
using Microsoft.AspNetCore.Builder;
using Microsoft.AspNetCore.Hosting;
using Microsoft.AspNetCore.Mvc;
using Microsoft.Extensions.Configuration;
using Microsoft.Extensions.DependencyInjection;
- In the ConfigureServices function, add the following JWT Bearer Authentication code at the beginning so the method looks like the following. You can get the Directory ID on the Application blade and the Tenant name in the Azure Active Directory’s Overview blade. For a complete list of TokenValidationParameters properties see https://docs.microsoft.com/en-us/dotnet/api/microsoft.identitymodel.tokens.tokenvalidationparameters?view=azure-dotnet
// This method gets called by the runtime. Use this method to add services to the container.
public void ConfigureServices(IServiceCollection services)
{
   services.AddAuthentication(sharedoptions =>
   {
      sharedoptions.DefaultScheme = JwtBearerDefaults.AuthenticationScheme;
   })
   .AddJwtBearer(options =>
   {
   // Example: “https://login.microsoftonline.com/contoso.onmicrosoft.com”
      options.Authority = 'https://login.microsoftonline.com/<tenant name> or <Directory ID>';
   /* if you intend to validate only one audience for the access token, you can use options.Audience instead of using options.TokenValidationParameters which allow for more customization. */
   // the Audience field here is typically your web API's Application ID
   // options.Audience = “10e569bc5-4c43-419e-971b-7c37112adf691”;
      options.TokenValidationParameters = new Microsoft.IdentityModel.Tokens.TokenValidationParameters
      {
         ValidAudiences = new List<string> { 'https://contoso.onmicrosoft.com/TodoListService', '10e569bc5-4c43-419e-971b-7c37112adf691' },
         // set the following issuers if you want to support both V1 and V2 issuers
         ValidIssuers = new List<string> { 'https://sts.windows.net/<Directory ID>/', 'https://login.microsoftonline.com/<Directory ID>/v2.0' }
      };
   });
   services.AddMvc().SetCompatibilityVersion(CompatibilityVersion.Version_2_2);
}
- In the Configure method add app.UseAuthentication(); right above app.useMvc() line so the method would look like this:
// This method gets called by the runtime. Use this method to configure the HTTP request pipeline.
public void Configure(IApplicationBuilder app, IHostingEnvironment env)
{
   if (env.IsDevelopment())
   {
      app.UseDeveloperExceptionPage();
   }
   else
   {
       // The default HSTS value is 30 days. You may want to change this for production scenarios, see https://aka.ms/aspnetcore-hsts.
      app.UseHsts();
   }
      app.UseHttpsRedirection();
      app.UseAuthentication();
      app.UseMvc();
}
- Here is what my complete Startup.cs file looks like with the above changes.
- In the ValuesController.cs file in the Controller folder add the following changes:
using System;
using System.Collections.Generic;
using Microsoft.AspNetCore.Authorization;
using Microsoft.AspNetCore.Mvc;

namespace CoreWebAPIAAD.Controllers
{
   [Route("api/[controller]")]
   [ApiController]
   [Authorize]
   public class ValuesController : ControllerBase
   {
      ….
By adding the AuthorizeAttribute [Authorize] to the class ValuesController, we require authentication when invoking any method in this controller. In the example below we will use Postman to invoke the Get method with code below:
// GET api/values
[HttpGet]
public ActionResult<IEnumerable<string>> Get()
{
   return new string[] { "Value 1", "Value 2"};
}
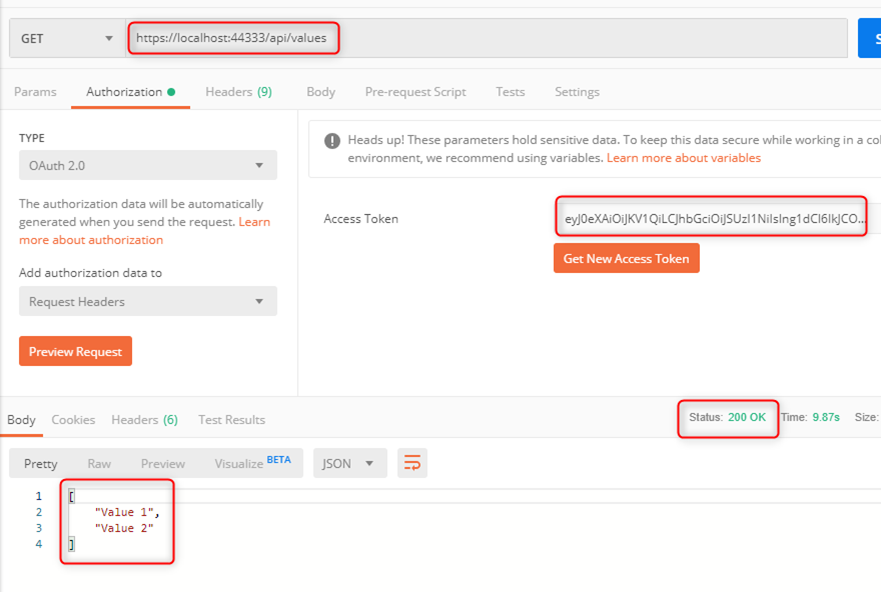
Rebuild and run the solution project. By default it will open a browser and navigate to https://localhost:44333/api/values showing a blank page. If you look at this request in a network trace like Fiddler or Network tab in the browser’s developer tool, this request results in a 401 response since the request is not authenticated.
Testing our web API app with Postman
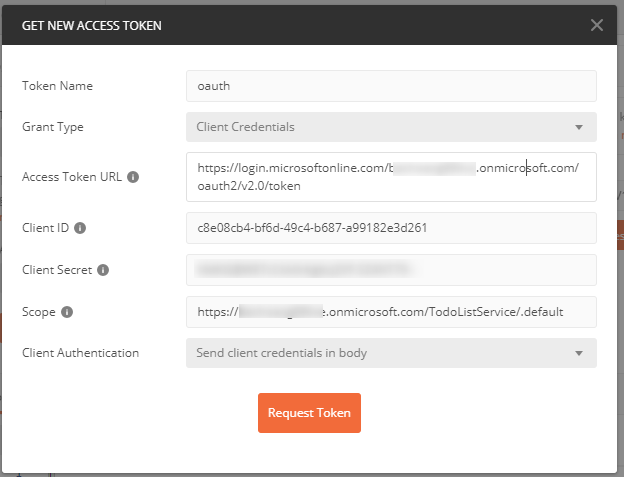
We will use Postman to request an access token to our web API app using the client credentials grant flow. This technique is demonstrated in this post.
Client ID is the application ID of the client app. Client Secret is the secret created above for the client app. For scope, use web API’s “<Application ID URI>/.default” (for example https://contoso.onmicrosoft.com/TodoListService/.default). The Application ID URI will show up in the access token’s ‘aud’ claim.
Using that access token we should be able to call our web API successfully:
