In a previous blog post, I talked about how to use MSAL.Net client application to call an Azure Function App with Easy Auth enabled in a regular tenant. In this post, I’ll describe the process to use an MSAL.Net client application to call a Web API application with Easy Auth enabled in a B2C tenant. I assume you already have an API App created on Azure App Service. If you don’t have one, follow the instruction at https://docs.microsoft.com/en-us/azure/app-service/app-service-web-tutorial-rest-api to create a sample API app and deploy to Azure App Service. Let’s go through this exercise:
-
Register the API App in a B2C tenant
Log into your Azure AD B2C tenant -> Click on the ‘Azure AD B2C’ blade -> Applications -> Add to add a new application with the following setting:
| Name | Enter a name |
| Include web app / web API | yes |
| Allow implicit flow | yes |
| Reply URL | https://<sitename>.azurewebsites.net/.auth/login/aad/callback |
| App ID URI | <tenant>.onmicrosoft.com/demo or enter your own scope |
| Native client | no |
Note:
for the Reply URL, you will need to enter the URL in that format since the aad/callback endpoint gets processed by the Easy Auth module
Here is what mine looks like after this is done. My API App is hosted at https://bhwebapitest.azurewebsites.net. Take note of the Application ID as you will need it later to configure Easy Auth

Click on ‘Published scopes’ and take note of the full scope value since you will need this for the MSAL.Net application.

-
Register an MSAL.Net client app in a B2C tenant
Follow the step above to create a new app registration with the following setting:
| Name | Enter the name of the client app |
| Include web app / web API | No |
| Include native client | yes |
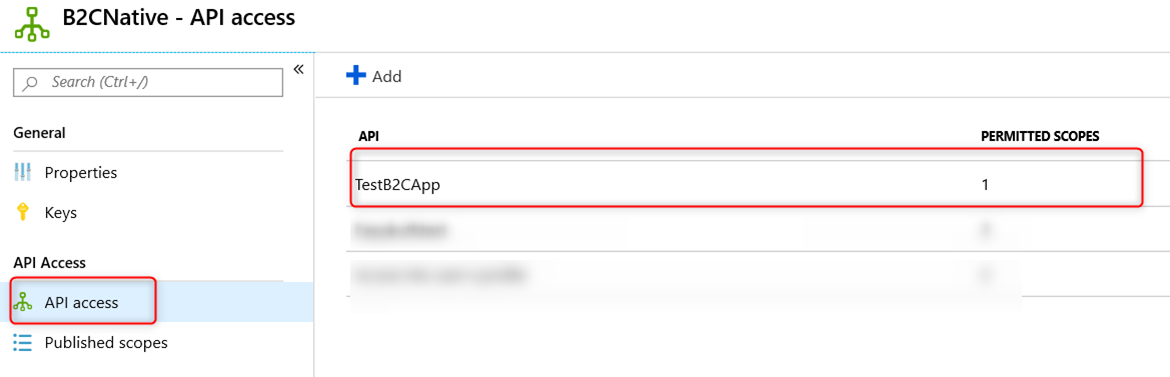
Once the application is created, click on API access -> Add -> select the API app created above in step 1 and select all available scopes and click on OK.
Here is what mine looks like after this is done. Take Note of the Application ID in the Properties blade as you will need it for the MSAL.Net application
-
Create a new User flow policy in the B2C tenant
In the Azure AD B2C blade -> select User flows (policies) -> click on “New user flow” and create a new “Sign up and sign in” policy. Follow the wizard to provide a policy name and select any attribute you desire under “User attributes and claims” section.
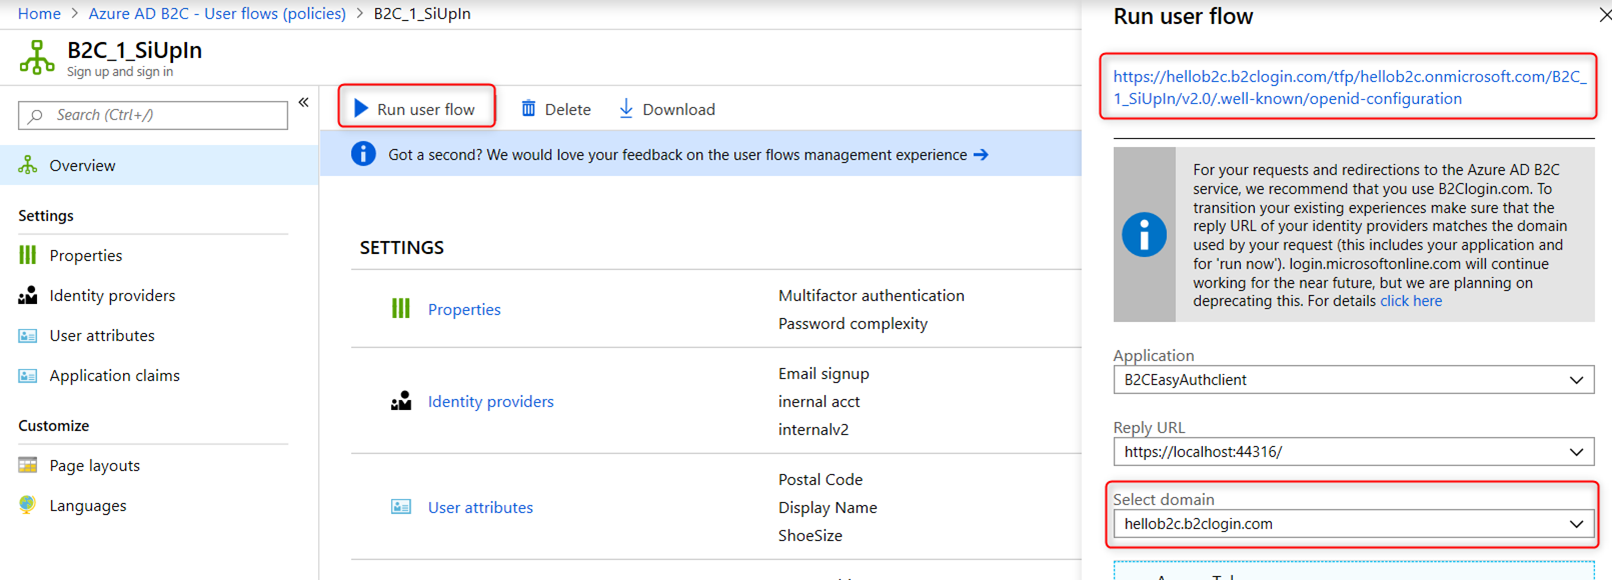
Once the policy is created, select that policy and click on “Run user flow” button. Take note of the URL under “Run user flow” as you will need it to configure Easy Auth.
My policy in this case in this case is B2C_1_SiUpIn and the well-known configuration URL is https://hellob2c.b2clogin.com/tfp/hellob2c.onmicrosoft.com/B2C_1_SiUpIn/v2.0/.well-known/openid-configuration
Note that this URL is dependent upon the domain used in the “Select domain” drop down. I used the format b2clogin.com domain in this case. If you change this domain to login.microsoftonline.com, the well-known configuration URL will be changed accordingly to https://login.microsoftonline.com/tfp/hellob2c.onmicrosoft.com/B2C_1_SiUpIn/v2.0/.well-known/openid-configuration.
-
Enable Easy Auth for the API Application
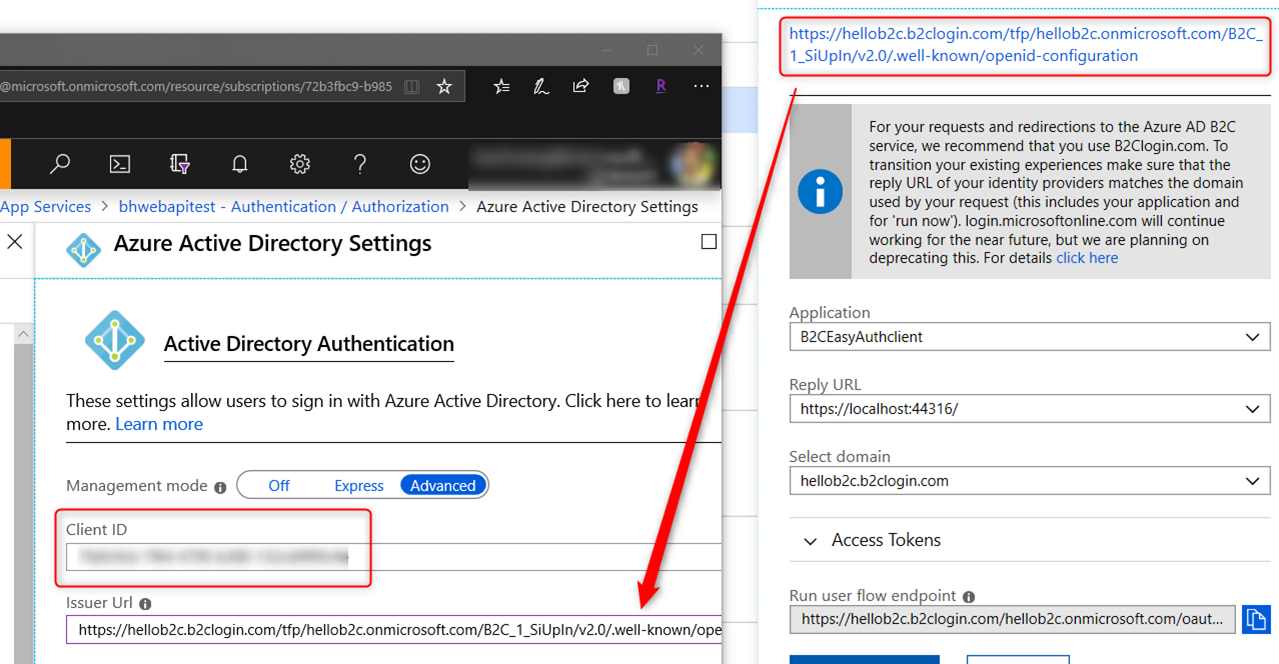
Follow the steps in the previous blog to turn on Easy Auth. Choose Advanced Mode instead of Express Mode for this. For ‘Client ID’ field enter the Application ID of the B2C App created in step 1 above and use the well-known URL in the “Run user flow” for the “Issuer Url” field (see screen shot below). Click OK and Save to save the setting. Test the Easy Auth configuration in the web browser by browsing to your web API URL to make sure it’s working correctly. You should be prompted for login. Use an account in the B2C tenant to verify you can log in and get to the API application.
-
Create an MSAL.Net application
Create a C# Console Application with the following code. Make sure to add the MSAL.Net nuget package (Microsoft.Idenity.Client) to the application. You will need to change the following parameter for your application
// your b2c tenant name
private static readonly string Tenant = "<tenant>.onmicrosoft.com";
// your b2c tenant name
private static readonly string AzureAdB2CHostname = "<tenant>.b2clogin.com";
// Application ID of the MSAL.Net app
private static readonly string ClientId = "<Application ID>";
// Your Policy Name. Should be something similar to B2C_1_SomeName
public static string PolicySignUpSignIn = "<Your Policy Name>";
// use the full API scope in the "Published scopes" of the API app
public static string[] ApiScopes = { "<Your Web API scope>" };
// Your Web API
public static string ApiEndpoint = "<Your API endpoint>";
[gist id=”4e9f87996c88d65f26f247b381ea6505″ file=”MSALNetB2C.cs”]
Now you can test your MSAL.Net application to verify that it can successfully call the Web API application.
If you are using login.microsoftonline.com domain…
Just in case you are using login.microsoftonline.com domain instead of the b2clogin.com domain, in the Easy Auth ‘Issuer Url’ configuration you will need to enter the well-known configuration URL for login.microsoftonline.com as seen in the Azure AD B2C portal.
For the MSAL.Net application everything else is the same as above except for the AzureAdB2CHostname variable and it should be “login.microsoftonline.com”
private static readonly string AzureAdB2CHostname = “login.microsoftonline.com”;
References
https://cgillum.tech/2016/08/10/app-service-auth-and-azure-ad-b2c-part-2/