In this blog, I’ll show how to enable MSAL4J logging using the logback framework in a spring boot web application. I’ll use our Azure AD B2C web sample here. The complete code for this blog is on github. Refer to the MSAL for Java logging documentation for more info. There are 3 main things you need to do for logging to work
1) Include the logback package in the pom.xml file
		<dependency>
			<groupId>ch.qos.logback</groupId>
			<artifactId>logback-classic</artifactId>
			<version>1.2.3</version>
		</dependency>
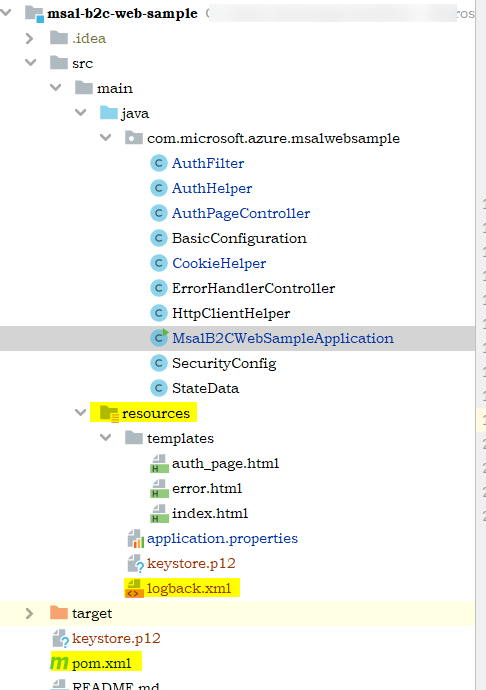
2) Add a file called ‘logback.xml’ with the following content to the resources folder.
This configuration (aka appender) logs to the console. There are other example appenders here you can use as well. You can change the logging level to a different level (error, warning, info, verbose) in your application since debug level is quite chatty.
<?xml version = "1.0" encoding = "UTF-8"?>
<configuration>
    <appender name="STDOUT" class="ch.qos.logback.core.ConsoleAppender">
        <encoder>
            <pattern>%d{HH:mm:ss.SSS} [%thread] %-5level %logger{36} - %msg%n</pattern>
        </encoder>
    </appender>
    <root level="debug">
        <appender-ref ref="STDOUT" />
    </root>
</configuration>
3) Set the logging.config property to the location of the logback.xml file before the main method:
@SpringBootApplication
public class MsalB2CWebSampleApplication {

	static { System.setProperty("logging.config", "C:\\Users\\<your path>\\src\\main\\resources\\logback.xml");}
	public static void main(String[] args) {
		// Console.log("main");
		// System.console().printf("hello");
		// System.out.printf("Hello %s!%n", "World");
		System.out.printf("%s%n", "Hello World");
		SpringApplication.run(MsalB2CWebSampleApplication.class, args);
	}
}
HTTPS support
The sample uses https. I follow step 2 from ‘Configure the Web App‘ section to generate a self-signed certificate and place the keystore.p12 file in the resources folder.
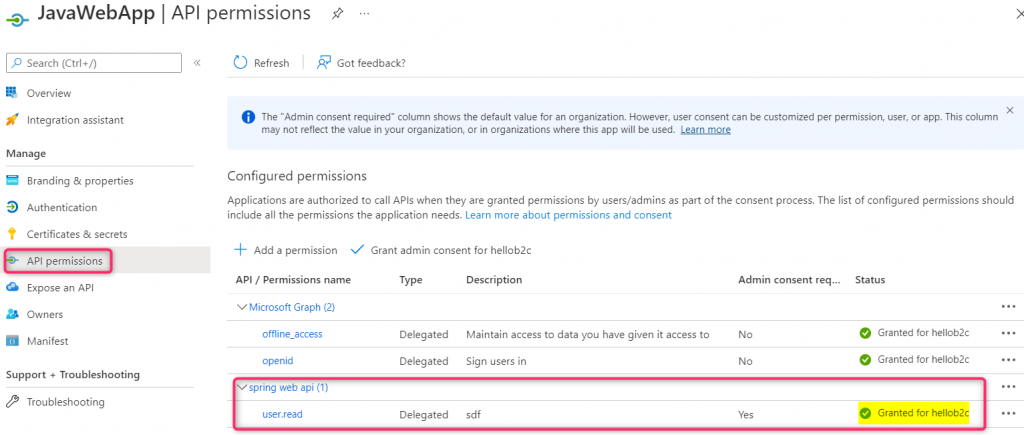
App Registration
Make sure you have 2 different app registrations in your Azure AD B2C tenant. One for the web app and one for the web API. Expose the scope in the web API (refer to this documentation if you are not familiar with how to expose web API scope) and configure the web API scope in the ‘API Permission’ blade for the web app. You should also grant admin consent to all the configured permission in the web app. You can also follow this tutorial for app registrations covered in this blog. Below is my set up:
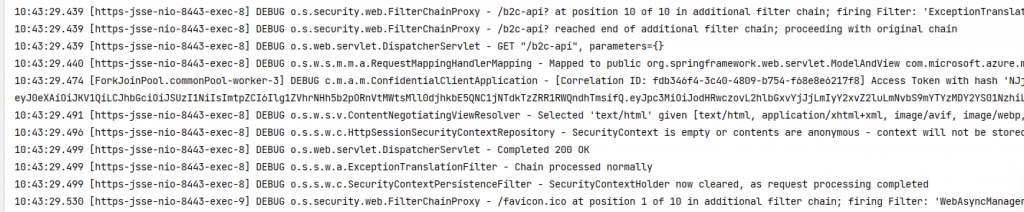
Below is how logging should look like when done correctly: