Introduction
This post should show how to create an app service, configure authentication for the service, and then configure the authentication to get permissions to the AAD Graph API on behalf of the logged-in user. This post is an extension of the Azure App Service Token Store, the link to that can be found here. This is the entire setup scenario from scratch, starting with creating the web app, and enabling the app service to get an AAD Graph API access token in the token store. Please note that this is different from the Microsoft Graph API;
Setup
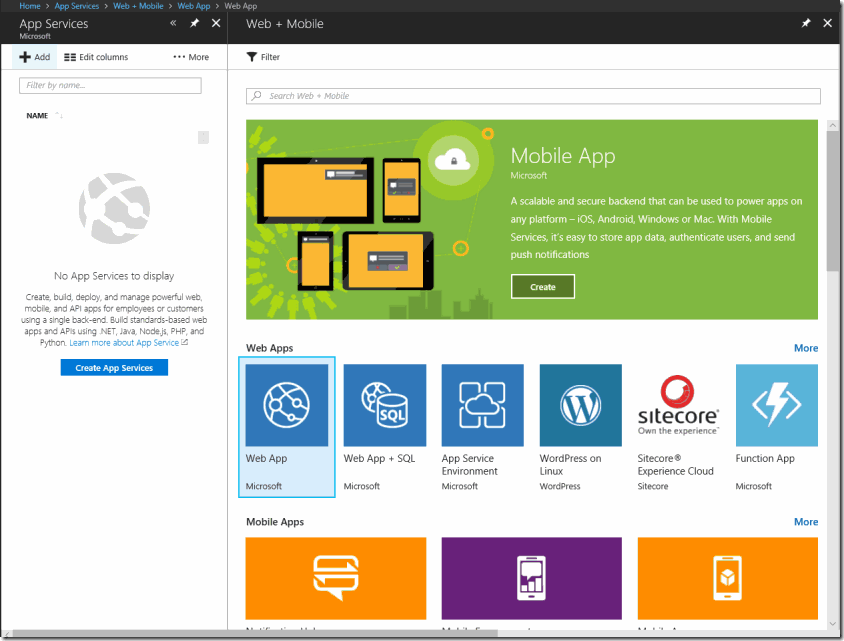
For clarity sake, I am including how I setup the app service so any repro following this guide should work without an issue. To setup the web app we go to the app service blade and press the add button, and then web app. Here I just have the default web app configurations and then press the create button.
Configure Web App for Easy Auth Service
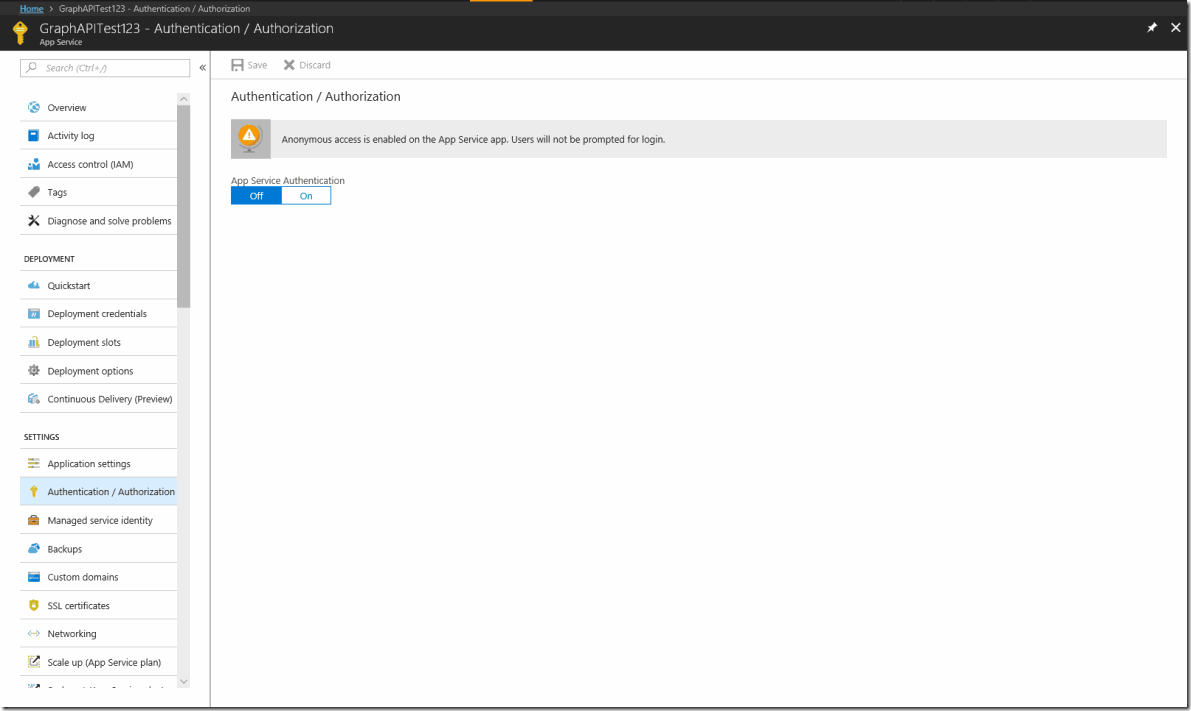
After you’ve created the web app, go into the app service blade and go to authentication/authorization.
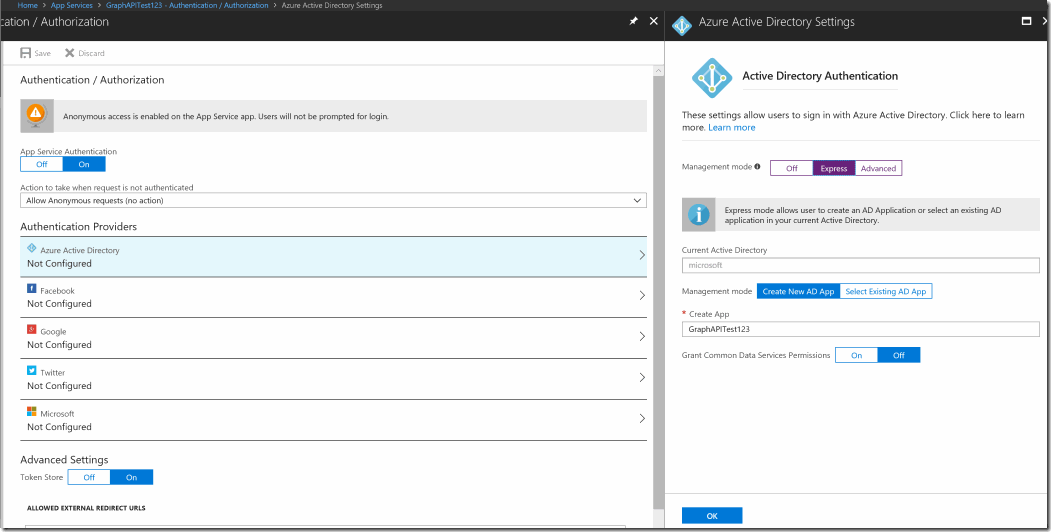
Flip the switch to on, and then click on Azure Active Directory underneath Authentication providers. From there turn the management mode switch to express and then press ok. You can see the save button at the top left of the bottom picture. Remember to press OK after configuring express for AAD Authentication.
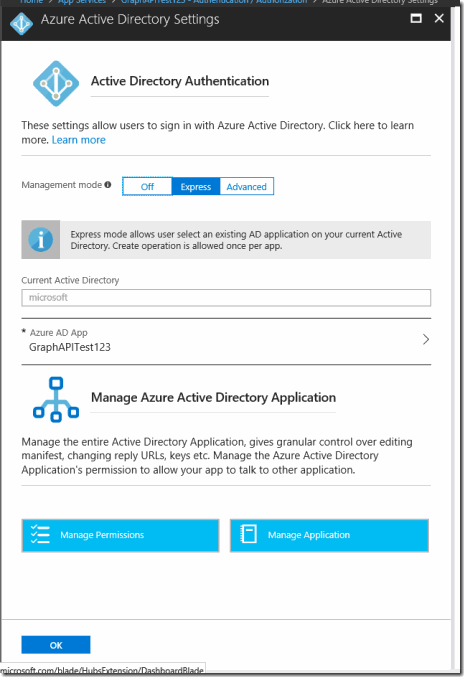
You will have to close this blade out now in order to see the AAD Application. In the picture shown you will see the application after going back into the web app blade.
Configuring Permissions
From there click on manage permissions, and we are going to want to add the permissions for the AAD Graph API. On the required permissions blade, you should see Windows Azure Active Directory, these are the permissions to the AAD Graph. After clicking on this item add whichever permissions you would like for the application. Here we are only giving the user delegated permissions for sign in and read user profile and read directory data. If you would like to know more information regarding delegated vs application permissions please refer to this documentation
If you would like to know more about the permissions/scopes regarding Windows Azure Active Directory, you can go to the documentation regarding the permissions and scopes here.
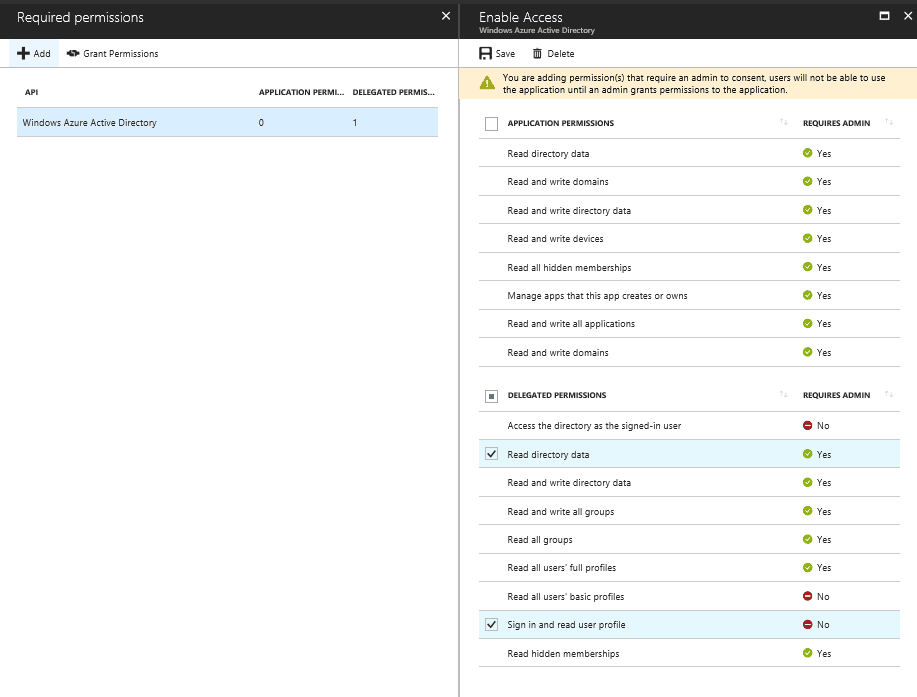
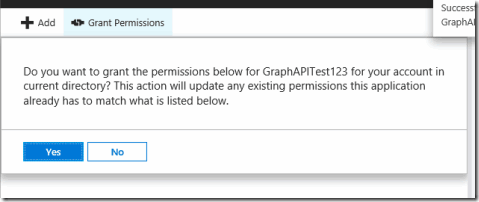
From there please press the grant permissions button if one or more of the selected permissions require admin consent as the global admin.
Configure Web App to Ask for Access to Correct Resource
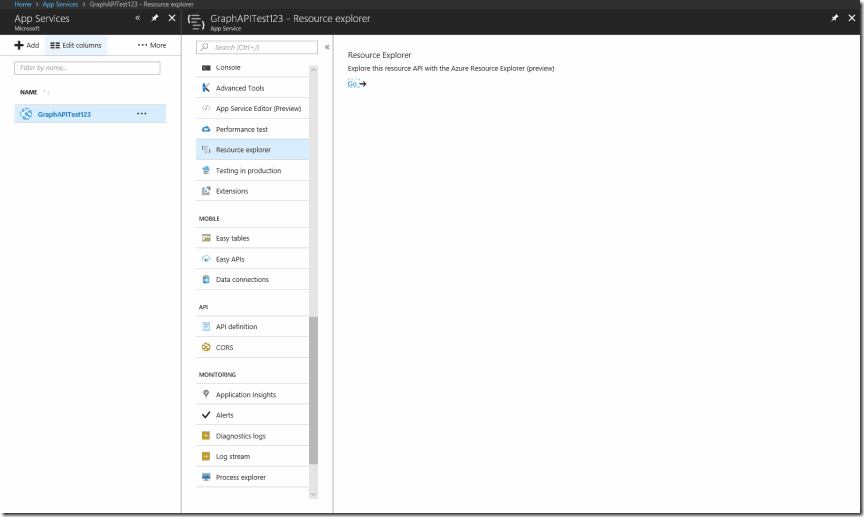
You have now made a web app with authentication enabled and delegated permissions to access the AAD Graph API. However your app service is not configured to use your client secret and to access the resource. Without these values your web app won’t ask to get access to the AAD Graph API. In order to configure your app service to get access to these resources you will have to go to the azure resource explorer. You can find this in the app service blade as the name resource explorer.
It can also be found here at this link.
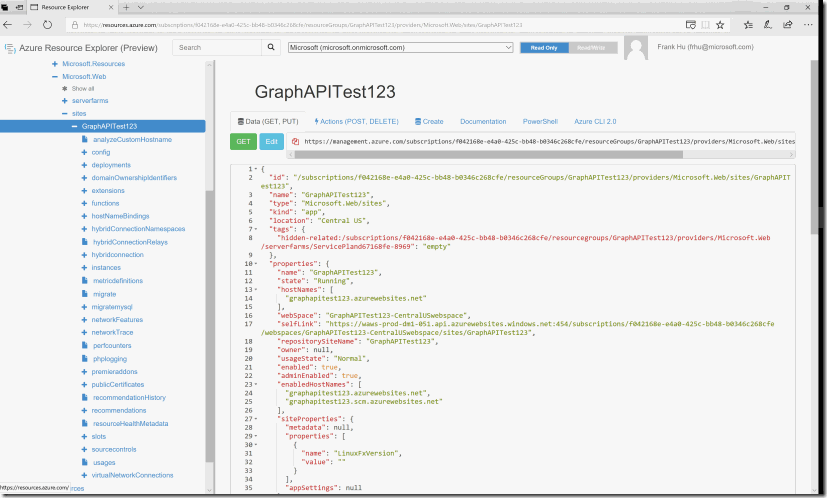
From there look for your app service name in the search bar at the top.
please make sure the tenant name next to the search bar is correct. After finding your app service, go under the site node and go to /config/authsettings.
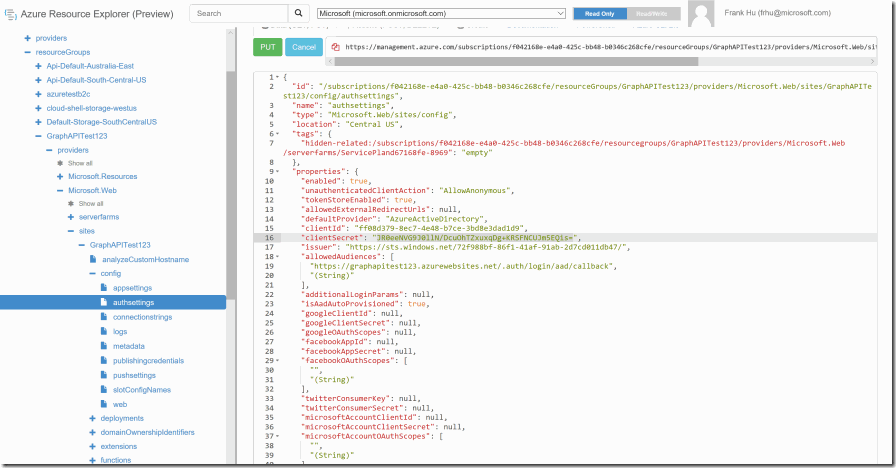
Click the edit button, and change the client secret to the secret your AAD Application has configured under the advanced authentications settings.
In addition to adding client secret, change the additionaloginparams to the following
[“response_type=code id_token”, “resource=https://graph.windows.net”]
Click the read/write button at the top of the page and then press put after adding this information.
After you’ve configured all these settings, the next time a user logs in you will receive a one-time prompt to consent to AAD Graph API access. Then your app service auth should start receiving the X-MS-TOKEN-AAD-ACCESS-TOKEN header which you can utilize to access the AAD Graph API.
Additional Notes Regarding Access to Other APIs
Please note that this process can also be applied to get resources from different API endpoints as well. For example, in order to get access to the Microsoft Graph API you can grant permissions for the Microsoft Graph API, and then modify the additionalloginparams to have the resource https://graph.microsoft.com you can find more about the differences between the two APIs here.
Also, if you would like to know the different scopes/permissions for the Microsoft Graph API you can find that here.
Also, please note that we do not support getting access to multiple resources at one time using easy auth. You will have to implement a basic AAD auth flow, one is described here : https://docs.microsoft.com/en-us/rest/api/datacatalog/authenticate-a-client-app
And then you will have to call the acquire token method for each of your resources in order to get an access token for each one of your resources.
Below is taken from the post : https://cgillum.tech/2016/03/25/app-service-auth-aad-graph-api/
from CGillum the original blog post writer of this information.
Calling the AAD Graph API as the End-User
Once the app is properly configured, the code to obtain the token and call into the Azure AD Graph API using the user’s identity is relatively trivial. Here is a C# example of how to obtain the user’s profile photo from the Azure AD Graph from within your Web, Mobile, or API app:
// The access token can be fetched directly from a built-in request
// header! If this is null, it means you either haven’t completed
// the setup prerequisites or you have disabled the token store in
// the Azure portal.
string accessToken = this.Request.Headers[
“X-MS-TOKEN-AAD-ACCESS-TOKEN”];
// Call into the Azure AD Graph API using HTTP primitives and the
// Azure AD access token.
var url = “https://graph.windows.net/me/thumbnailPhoto?api-version=1.6”;
var request = WebRequest.CreateHttp(url);
var headerValue = “Bearer ” + accessToken;
request.Headers.Add(HttpRequestHeader.Authorization, headerValue);
using (var response = request.GetResponse())
using (var responseStream = response.GetResponseStream())
using (var memoryStream = new MemoryStream())
{
responseStream.CopyTo(memoryStream);
string encodedImage = Convert.ToBase64String(
memoryStream.ToArray());
// do something with encodedImage, like embed it into your HTML…
}
The above example is intentionally trivial, but you could imagine customizing it to use other Azure AD Graph APIs, including group membership APIs for building your own security group ACLs. I’ll also point out that I used HTTP primitives rather than using the official Graph API Client SDK. This was mainly to emphasize that access to the Azure AD Graph API can be written in any language and doesn’t require any SDKs (though you can certainly use the SDKs if you like).
If you’d like more information on the available Azure AD Graph APIs, please consult the documentation on MSDN: https://msdn.microsoft.com/en-us/library/azure/hh974476.aspx. If you have any questions or are running into issues, I recommend posting them on StackOverflow and adding the tags azure-app-service and azure-active-directory. Also, be sure to reference this post in your question. I hope this is helpful
