Introduction
Postman is an HTTP request tool that is very handy for developing and testing your Azure requests. This is the Postman website: https://learning.getpostman.com/
Postman does make it easy to setup authentication and acquire access tokens but it normally is a multi-step process. The purpose of this blog post is to show you how you can setup Postman to automatically handle authentication for you so you don’t have to go get a new token manually to test with. This example will concentrate on using the Client_Credentials flow targeting Microsoft Identity Platform V2 endpoint.
Client credentials flow V1 endpoint
Client credentials flow V2 endpoint
Setup the Environment
The first step in this process is to setup your environment so you can create variables that will be used in your headers and or body. To do this, you can use the “New” button on the upper left corner of the screen. There is also a gear icon in the upper right hand corner of the screen where you can create the environment as well but lets start with the New button
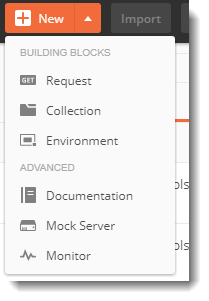
Click on “New” à “Environment” and give it a meaningful name. In my example, I am using a dummy tenant name.
Lets add some environment variables in the Variable chart for that environment. You could add the variables on the collection side but I prefer using the environment so I can switch values easily just by selecting the environment.
Add the following variables:
- client_id
- client_secret
- token_endpoint
- scope
- access_token
Set the initial and current values on the variables. Make sure you have a properly setup app registration with Microsoft Graph application permissions for User.Read.All to test this script and you have performed admin consent on those permissions. Also, note that all variables are case sensitive!
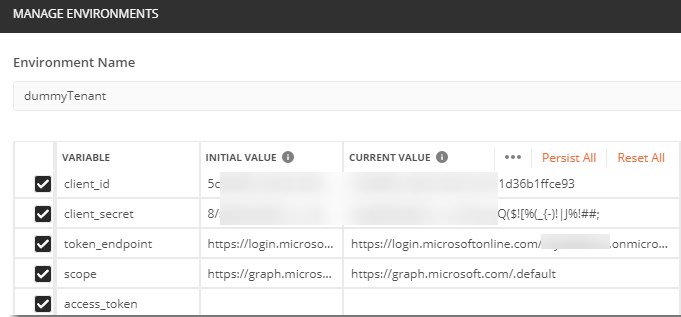
The V2 endpoint would look like this: https://login.microsoftonline.com/{tenant}/oauth2/v2.0/token/ (where {tenant} is where you would also add the tenant id – you cannot use a variable here )
Note: If you’re going to hit the v1 endpoint, you will not be using a scope parameter and would instead, need the resource parameter.
The scope would obviously depend on the resource you’re needing a token for. For Microsoft Graph, it would be: https://graph.microsoft.com/.default — just pulling the Microsoft graph permissions off your app registration. Your access token would then be for Microsoft Graph.
Next, create a collection to save your scripts to
Click on “New” à Collection. Give your collection a meaningful name and description if you like, then on the Pre-requests Scripts tab, add this script:
[gist id=”9bb52b6f4c4df275a7b6350e1a10fbd4″]
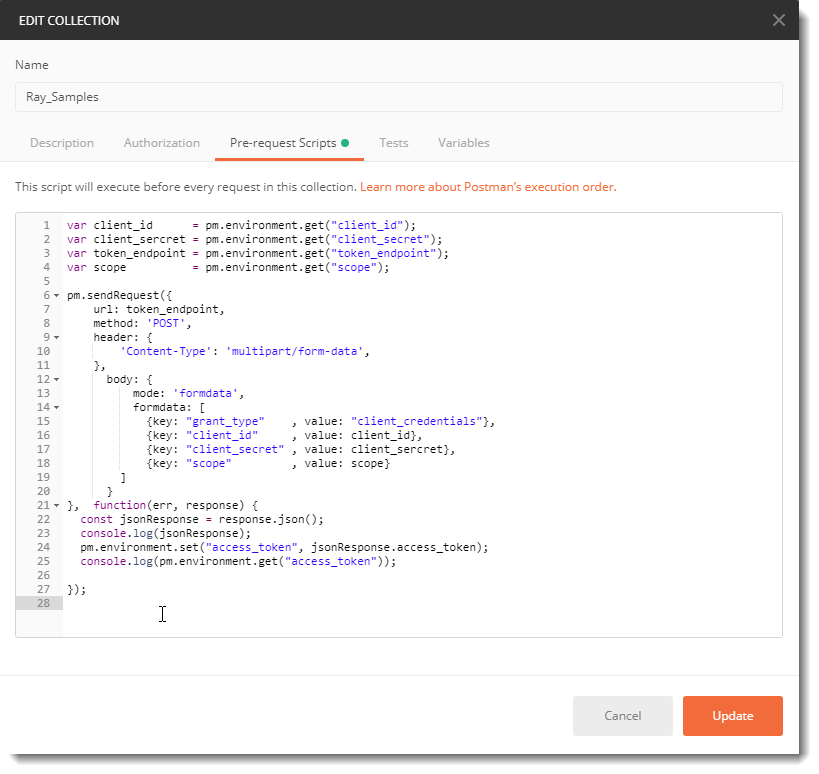
Then click update.
Build a simple Test Request
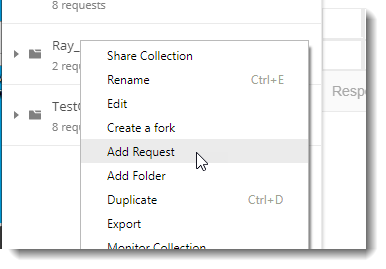
Now, build a simple request and save it into the Collection folder you have created. You can build a new request by right clicking on the new collection you’ve just created and then selecting “Add Request” and it will automatically be added to the collection.
See how I’ve used my variable names in key places for this request.

My URL for the GET request is: https://graph.microsoft.com/beta/users
I’ve added one simple Header for “Authorization” and set the value to: “Bearer {{access_token}}”
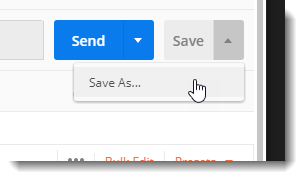
If you did not right click on the collection to add a new request, you can save the request setup to the collection by clicking on the Save drop-down box, then Save As:
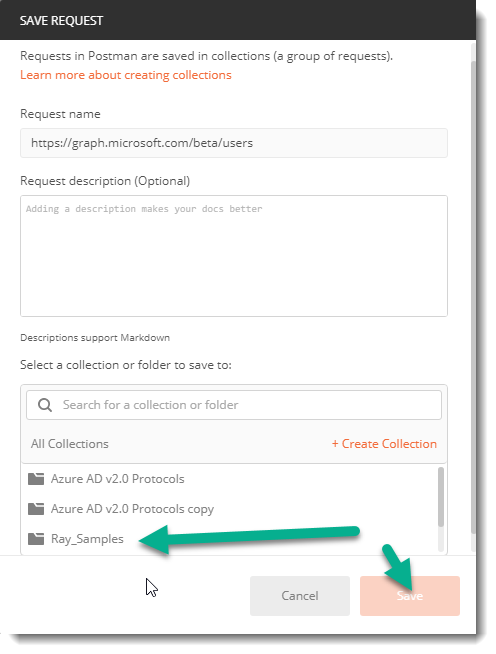
Be sure to select the collection you created that has the pre request script on it and then save:
Run the request
When running your request now, make sure you have the correct environment selected to get the proper variable values
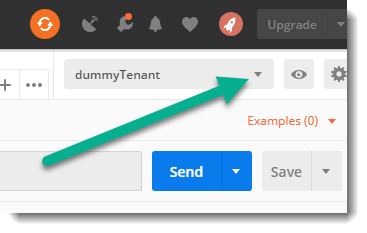
Click the send button and you should get the list of users in your tenant.
View the console for additional information
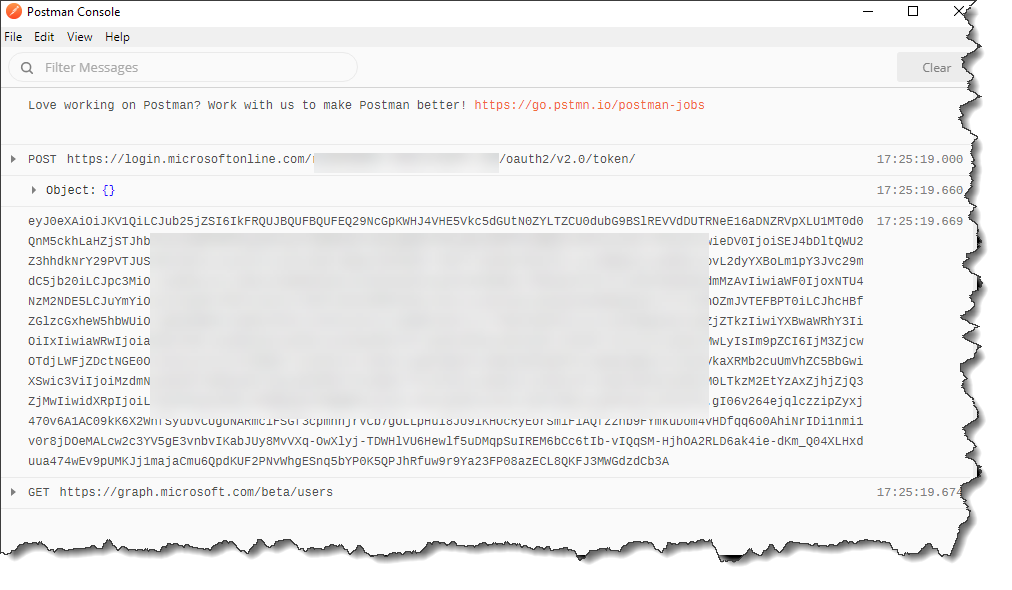
As you can see in the script, I am outputting some information for you into the console window. You can show the console window before running the script by clicking on View à Show Postman Console
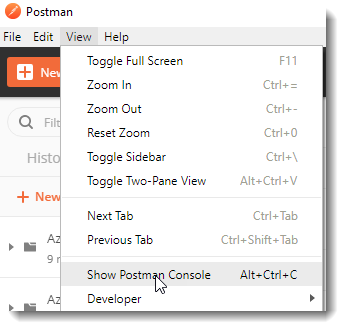
You can see information in the console window such as the token that was generated and the calls that were made:
Summary
You can setup postman to make building requests for testing and troubleshooting purposes for the client_credentials flow by easily setting up a few variables, adding the pre-request script and then plugging the variables into your request. Each time the request is sent, you can get a new access token and use that as the bearer token for the request. You can open the console screen in postman (View/console) and see the token that was generated if you want to view that in http://jwt.ms as the script is outputting the token into the console, for additional troubleshooting purposes.